
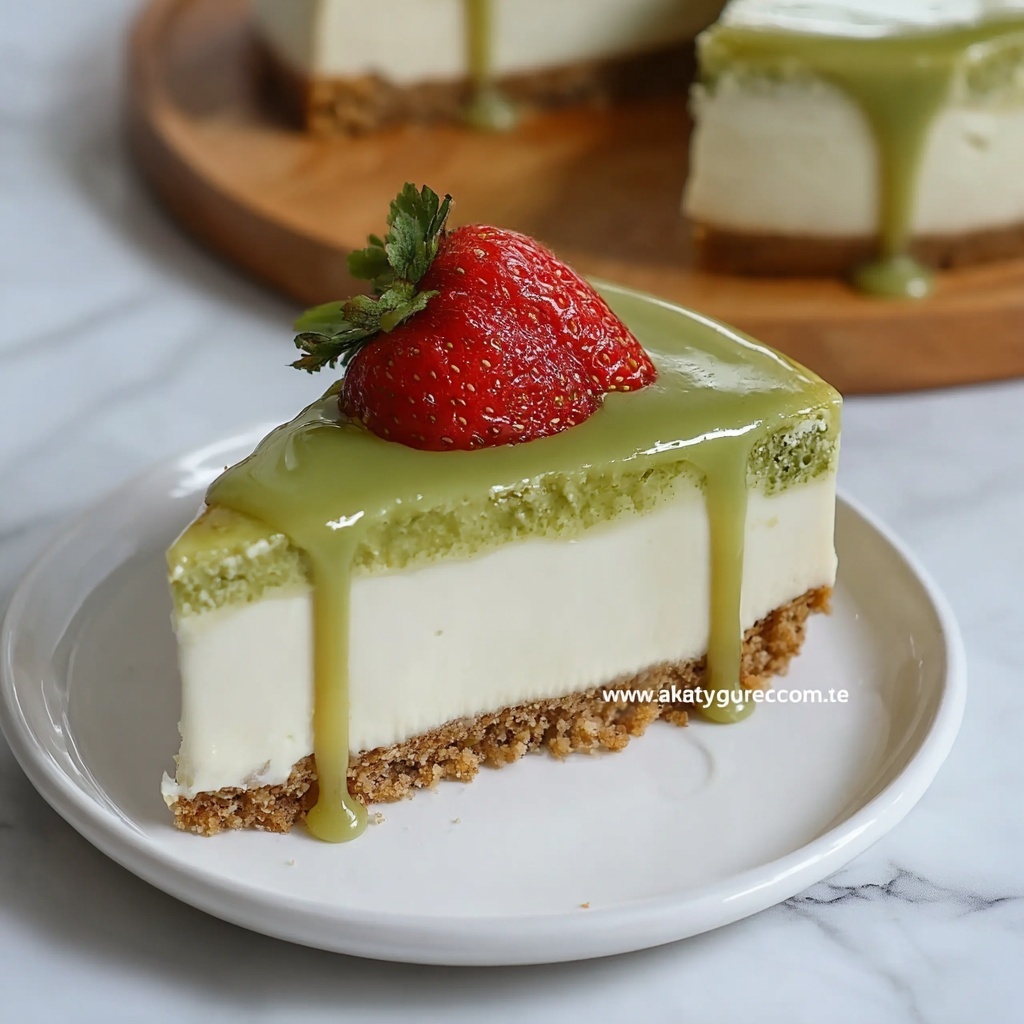
If you adore the smooth, nutty flavors of pistachios combined with the rich creaminess of cheesecake yet want to skip the oven, this No Bake Pistachio Cheesecake Recipe is your new best friend. It’s incredibly luscious, effortlessly elegant, and perfect for those moments when you crave a dreamy dessert without heating up the kitchen. With a buttery biscuit crust supporting a fluffy, velvety pistachio filling, this cheesecake balances nutty sweetness and creamy decadence to delight every bite. Trust me, this recipe will quickly become a staple for celebrations or simple indulgences alike!
Ingredients You’ll Need
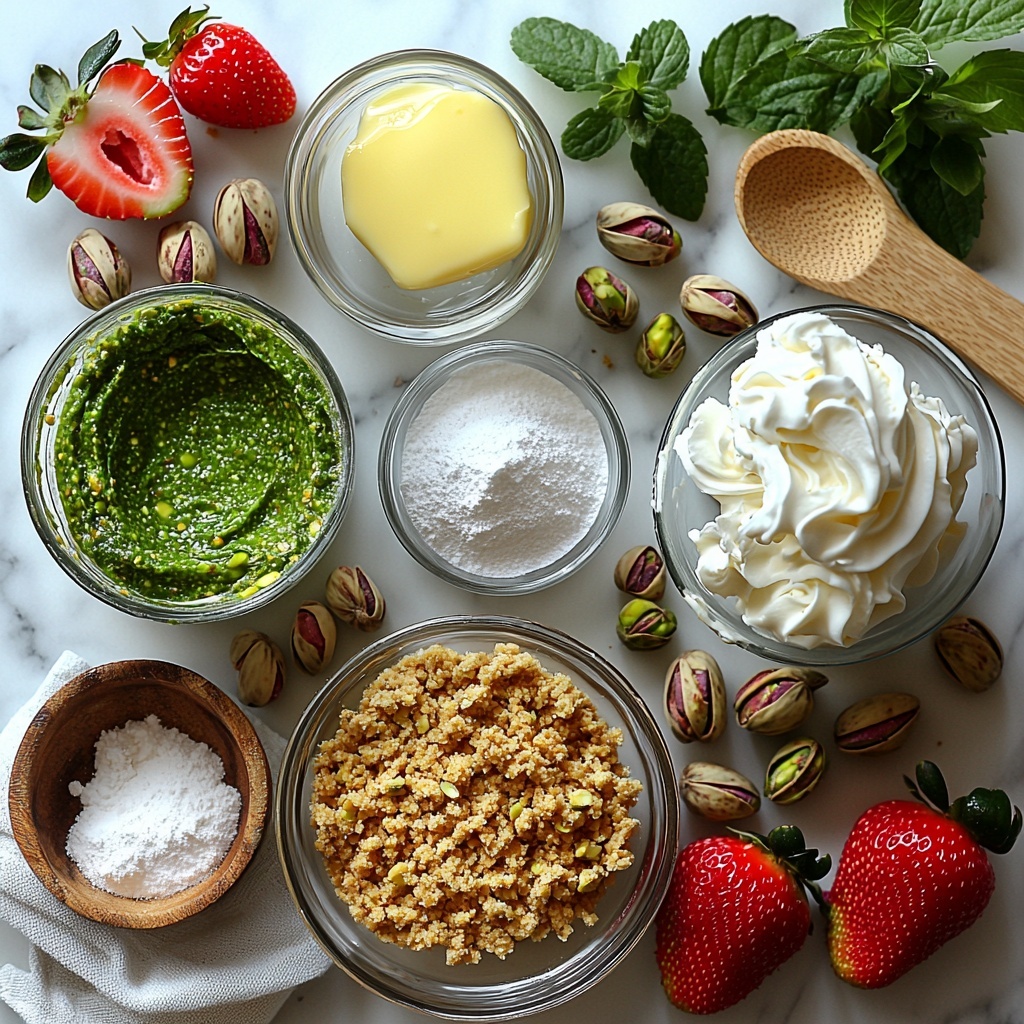
This No Bake Pistachio Cheesecake Recipe calls for straightforward ingredients that come together beautifully. Each plays a special role, whether it’s adding crunch, creaminess, or that signature pistachio taste and gorgeous color.
- Biscuits (200 grams): A crunchy, neutral base that forms the crust and supports the cheesecake’s creamy filling.
- Melted butter (45 grams): Binds the crushed biscuits to create a firm, buttery crust that’s crisp and delicious.
- Cream cheese (500 grams): The heart of any cheesecake, providing the rich, tangy creaminess essential for texture and flavor.
- Pistachio spread (150 grams + 100 grams): Infuses the filling and topping with that irresistible, nutty pistachio essence and smoothness.
- Powdered sugar (100 grams): Sweetens the filling gently and helps achieve a silky consistency.
- Heavy whipping cream (200 grams, 35% fat): Whipped to soft peaks, it lightens the filling making the cheesecake airy yet indulgent.
- Strawberries: Adds a bright, fresh contrast in flavor and makes the presentation pop with color.
How to Make No Bake Pistachio Cheesecake Recipe
Step 1: Prepare the Biscuit Crust
Start by crushing the biscuits until they are finely ground; this can be quickly done using a food processor, blender, or simply with a rolling pin inside a sealed bag. Melt your butter and mix it thoroughly with the crushed biscuits so that the crumbs resemble wet sand. This careful coating allows the crust to hold together beautifully without crumbling apart once set.
Step 2: Press the Crust into the Pan and Freeze
Grease your cheesecake pan lightly for easy removal later, then press your biscuit mixture firmly across the bottom and slightly up the sides. Use the back of a spoon or the bottom of a glass to create an even, compact base. Pop it into the freezer while you prepare your luscious pistachio cheesecake filling; this chill step helps lock the crust’s shape before the softer filling goes on.
Step 3: Mix the Cream Cheese and Pistachio Spread
In a clean bowl, combine the cream cheese at room temperature with 150 grams of the pistachio spread. Blend them until the mixture is totally smooth and without lumps. This forms the rich base of your filling that marries tangy cheese with sweet pistachio in a velvety harmony.
Step 4: Whip the Cream with Powdered Sugar
In a cold bowl, whip the heavy cream with powdered sugar until you reach soft peaks—this means it should hold gentle peaks but still be slightly soft, not stiff. This whipped cream adds a dreamy, airy lift to your filling, ensuring the cheesecake won’t feel dense but rather light and fluffy.
Step 5: Fold the Whipped Cream into the Pistachio Mixture
Gently fold the whipped cream into your cream cheese and pistachio blend in three batches. Folding rather than stirring preserves the airiness, keeping your filling light and soft. Take your time with this step to avoid deflating the mixture, which makes for that melt-in-your-mouth texture we all love.
Step 6: Chill the Cheesecake to Set
Pour the filling over your chilled crust, smoothing the surface nicely. Cover and refrigerate the cheesecake for at least 8 hours, preferably overnight, allowing it to set perfectly and for all the luscious flavors to meld. This resting time is essential to achieve that signature firmness you expect from a cheesecake without baking it.
Step 7: Garnish and Serve
Once set, warm the remaining pistachio spread just enough to drizzle it over the cheesecake’s surface, creating a glossy, nutty finish. Decorate with fresh strawberries or sprinkle chopped pistachios for an eye-catching and scrumptious topping. Slice generously and watch your guests delight in every creamy, nutty slice!
How to Serve No Bake Pistachio Cheesecake Recipe
Garnishes
The final touches can really elevate your No Bake Pistachio Cheesecake Recipe. Fresh strawberries add vibrant color and a juicy, tart counterpoint to the sweetness. A handful of chopped or crushed pistachios sprinkled on top introduces a satisfying crunch and reinforces the pistachio flavor beautifully.
Side Dishes
This cheesecake pairs wonderfully with light accompaniments like a berry coulis or a small scoop of vanilla ice cream. These side treats enhance the nutty creaminess without overpowering it, creating a well-rounded dessert experience.
Creative Ways to Present
For a twist, serve individual portions in pretty glasses layered with crushed biscuits and pistachio filling for a no-fuss mini cheesecake parfait. Or try spreading a thin layer of good-quality dark chocolate underneath the crust for a chocolate-pistachio delight. Thoughtful presentation always makes dessert feel extra special.
Make Ahead and Storage
Storing Leftovers
Your No Bake Pistachio Cheesecake Recipe leftovers should be covered tightly and kept in the refrigerator. It stays fresh and creamy for up to 3 days, making it a perfect make-ahead treat for your busy schedule.
Freezing
You can freeze this cheesecake if needed. Wrap it well in plastic wrap and place it in an airtight container. When you’re ready to enjoy, thaw it in the fridge overnight. Note that the texture may be slightly altered but still delicious.
Reheating
No reheating required here! This cheesecake is best served chilled for its light texture and refreshing pistachio flavor. Keeping it cold preserves the perfect mouthfeel and balance of sweetness.
FAQs
Can I use a different nut spread instead of pistachio?
Absolutely! While pistachio spread gives this cheesecake its unique flavor, you can experiment with almond butter or hazelnut spread for a different nutty twist. Just keep in mind the flavor profile will change accordingly.
Do I need a special pan for this cheesecake?
No special pan is needed, but a springform pan works best to release the cheesecake easily. Alternatively, any pan with a removable base or simply greased well will do the job.
Is it necessary to chill the crust before adding the filling?
Yes, chilling the crust helps it firm up so it supports the creamy filling without crumbling. Placing it in the freezer for a short time is ideal before you spread the filling on top.
Can this cheesecake be made vegan or dairy-free?
With some ingredient swaps like vegan cream cheese, coconut cream, and dairy-free biscuits, you could adapt this recipe for a vegan or dairy-free version, though the texture and flavors might vary a bit.
How long can I keep this cheesecake in the fridge before it spoils?
If stored properly covered in the refrigerator, the cheesecake remains delicious for up to 3 days. Beyond that, the texture and flavor may start to decline, so it’s best enjoyed sooner.
Final Thoughts
This No Bake Pistachio Cheesecake Recipe is pure joy on a plate — simple to make, stunning to serve, and utterly irresistible. It’s a fantastic way to enjoy creamy cheesecake without any baking hassle, with every forkful bursting with nutty, creamy goodness. Give it a try and I promise it will become one of your most cherished dessert recipes to share with friends and family. Happy no-baking!
Print
No Bake Pistachio Cheesecake Recipe
- Prep Time: 20 minutes
- Cook Time: 0 minutes
- Total Time: 8 hours 20 minutes
- Yield: 8 servings
- Category: Dessert
- Method: No-Cook
- Cuisine: American
- Diet: Vegetarian
Description
This No-Bake Pistachio Cheesecake is a creamy, indulgent dessert featuring a buttery biscuit crust and a smooth pistachio-flavored cheesecake filling. Perfect for those who want a rich and fluffy cheesecake without turning on the oven, this recipe combines the nutty flavor of pistachios with a light whipped cream texture. It sets in the refrigerator, making it an easy and elegant treat to prepare ahead of time and impress guests.
Ingredients
Biscuit Crust
- 200 grams biscuits
- 45 grams melted butter
Cheesecake Filling
- 500 grams cream cheese, room temperature
- 150 grams pistachio spread
- 100 grams powdered sugar
- 200 grams heavy whipping cream (35%), cold
Topping and Garnish
- 100 grams pistachio spread (for topping)
- Fresh strawberries (for garnish)
Instructions
- Prepare the Biscuit Crust: Begin by finely crushing the biscuits using a food processor, blender, or rolling pin. Melt the butter in the microwave or on the stovetop. Mix the melted butter thoroughly with the crushed biscuits until the mixture resembles wet sand, ensuring all crumbs are coated evenly.
- Press the Crust into the Pan and Freeze: Lightly grease a cheesecake pan to ease removal later. Evenly press the biscuit mixture firmly into the bottom and slightly up the sides of the pan to form a solid crust. Place the pan in the freezer to firm up the crust while you prepare the filling.
- Make the Pistachio Cheesecake Filling: In a clean bowl, combine the room-temperature cream cheese with 150 grams of pistachio spread. Mix until smooth and fully incorporated, free of lumps, creating a rich base for the cheesecake.
- Whip the Heavy Cream: In a separate cold bowl, add the cold heavy whipping cream and powdered sugar. Whip until soft peaks form, being careful not to over-whip to maintain a light texture.
- Fold Whipped Cream into the Cheesecake Filling: Gently fold the whipped cream into the cream cheese and pistachio mixture in three additions. Use a light hand to retain the airiness and avoid deflating the filling, achieving a fluffy and smooth texture.
- Chill the Cheesecake to Set: Pour the filling into the chilled biscuit crust, smoothing the top evenly. Cover the pan with plastic wrap or a tray, then refrigerate for at least 8 hours or overnight to allow the cheesecake to fully set and flavors to develop.
- Garnish and Serve: Once set, spread the remaining pistachio spread evenly over the top by tilting the pan gently. Garnish with fresh strawberries or crushed pistachios for extra flavor and visual appeal. Slice and serve chilled for a creamy, delightful dessert.
Notes
- Use room temperature cream cheese for a smoother filling without lumps.
- Do not over-whip the heavy cream to prevent it from becoming grainy.
- Press the biscuit crust firmly to ensure it holds together when sliced.
- Allow the cheesecake to chill for at least 8 hours to achieve the best texture and flavor.
- Use fresh or crushed pistachios for garnish to enhance texture and appearance.


