

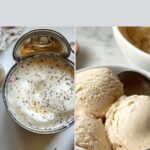
If you have ever craved a rich, creamy, and utterly delightful frozen dessert that fits perfectly into a plant-based lifestyle, you are going to adore this Vanilla Vegan Ice Cream: An Incredible Ultimate Recipe. This luscious treat combines the tropical creaminess of coconut milk with the subtle sweetness of organic cane sugar and the enchanting aroma of pure vanilla. Whether you are vegan, dairy-free, or simply seeking a refreshing homemade dessert, this recipe delivers an indulgent experience with every spoonful and proves that vegan ice cream can be irresistibly satisfying and delightfully simple to make at home.
Ingredients You’ll Need
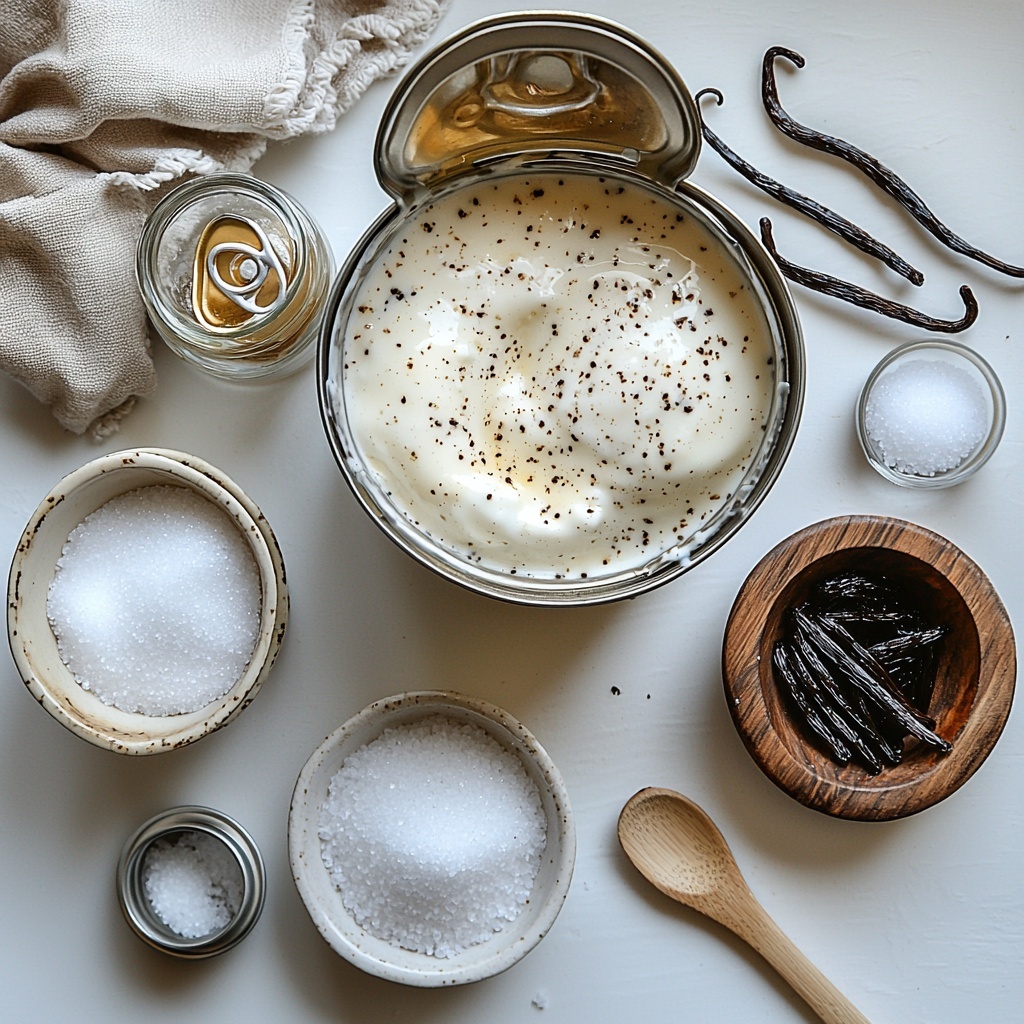
Gathering these ingredients is a breeze, but don’t let their simplicity fool you—each one plays a crucial role in creating the perfect balance of flavor, texture, and creaminess in your ice cream. From the richness of coconut milk to the gentle vanilla notes, every element enhances this dreamy vegan treat.
- Full-fat coconut milk (1 can, 13.5 ounces): Provides the creamy, luscious base that makes this ice cream silky smooth and indulgent.
- Unsweetened almond milk (1 cup): Adds volume and lightness without overpowering the coconut’s tropical flavor.
- Organic cane sugar (3/4 cup): Delivers just the right level of sweetness and helps with smooth texture during freezing.
- Cornstarch (2 tablespoons): This thickening agent keeps the ice cream velvety by preventing ice crystals from forming.
- Pure vanilla extract (1 tablespoon): Infuses classic vanilla warmth and depth throughout the creaminess.
- Vanilla bean paste (1 teaspoon, optional): Boosts vanilla intensity and adds charming flecks for a gourmet touch.
- Salt (1 pinch): Enhances the sweetness and balances all flavors perfectly.
How to Make Vanilla Vegan Ice Cream: An Incredible Ultimate Recipe
Step 1: Combine and Heat the Base
Start by whisking the coconut milk, almond milk, and sugar together in a medium saucepan over medium heat. Keep stirring until the sugar fully dissolves. This step is essential for a smooth, well-integrated mixture that forms the foundation of your ice cream’s flavor and texture.
Step 2: Thicken the Mixture
In a small bowl, blend the cornstarch with 2 tablespoons of the milk mixture to create a slurry. Then pour it back into the saucepan, stirring constantly. Cook this for about 5 to 7 minutes until it thickens slightly. This helps achieve that perfectly creamy consistency without ice crystals chilling your taste buds.
Step 3: Add Vanilla and Salt
Remove the saucepan from heat and stir in the pure vanilla extract, optional vanilla bean paste for extra richness, and a pinch of salt. This step unlocks the intoxicating aroma and elevates the dessert’s depth of flavor, transforming it into a truly luxurious treat.
Step 4: Chill the Mixture
Let the mixture cool at room temperature before refrigerating it for at least 4 hours or until completely cold. Chilling is key because it allows the flavors to marry and the texture to set, preparing it for the next exciting phase: churning.
Step 5: Churn the Ice Cream
Pour the chilled base into your ice cream maker and churn according to the manufacturer’s instructions. You’ll watch the mixture thicken and turn irresistibly creamy right before your eyes. This process brings the ice cream its light, airy texture without any artificial additives.
Step 6: Freeze to Firm Up
Transfer the churned ice cream to a freezer-safe container and freeze for 2 to 4 hours. This final freezing step helps the ice cream get firm enough for perfect scooping while maintaining its creamy smoothness.
How to Serve Vanilla Vegan Ice Cream: An Incredible Ultimate Recipe
Garnishes
Enhance every scoop with simple yet stunning garnishes like crushed toasted nuts, fresh berries, or a drizzle of vegan caramel sauce. These toppings add texture and complement the gentle sweetness of the vanilla vegan ice cream.
Side Dishes
Pair this incredible ultimate recipe alongside warm desserts such as freshly baked pie, fruit crisps, or rich brownies. The contrast between hot and cold creates a delightful sensory experience that’s truly unforgettable.
Creative Ways to Present
For a fun twist, serve scoops inside hollowed-out fruit shells like coconut or melon. You can also layer the ice cream with dairy-free chocolate shavings or swirl in vegan cookie crumbles to impress guests with personalized flair.
Make Ahead and Storage
Storing Leftovers
If you have any leftovers, store them in an airtight, freezer-safe container to preserve freshness and prevent freezer burn. This way, your Vanilla Vegan Ice Cream: An Incredible Ultimate Recipe stays ready for instant indulgence when cravings strike.
Freezing
You can keep the ice cream frozen for up to two weeks without sacrificing taste or texture. Just be sure to cover it tightly and allow a few minutes at room temperature before serving to achieve the perfect scoopable consistency.
Reheating
Since ice cream is best enjoyed chilled, reheating is not recommended. Instead, simply allow frozen portions to soften slightly at room temperature for 5 to 10 minutes before serving for the most enjoyable eating experience.
FAQs
Can I make this recipe without an ice cream maker?
Absolutely! Pour the chilled mixture into a shallow dish and freeze it, stirring every 30 minutes for 3 to 4 hours to break up ice crystals. It may take a little extra elbow grease, but the result is just as delicious.
Is this recipe soy-free?
Yes! This Vanilla Vegan Ice Cream: An Incredible Ultimate Recipe uses coconut and almond milk, so it’s completely soy-free. Just double-check the sugar is certified vegan to keep it free of hidden animal products.
Can I add mix-ins like chocolate chips or nuts?
Definitely. Add mix-ins such as dairy-free chocolate chips or crushed cookies during the last few minutes of churning in your ice cream maker for delightful textures and extra flavor.
How long does it take to make this ice cream from start to finish?
The hands-on prep and cooking time totals about 25 minutes, but the chilling and freezing take up the majority, adding approximately 4 hours and 25 minutes. Planning ahead ensures you’ll have dessert ready right when you want it.
What if I want a stronger vanilla flavor?
Incorporate vanilla bean paste along with pure vanilla extract, or increase the vanilla extract slightly—both ways will give your ice cream an even richer, more aromatic vanilla experience.
Final Thoughts
There you have it, a wonderfully rich, creamy, and flavorful Vanilla Vegan Ice Cream: An Incredible Ultimate Recipe that’s surprisingly easy to prepare at home. This dessert is perfect for sharing with loved ones or simply treating yourself to a plant-based indulgence. Dive into making it today and discover how vegan ice cream can be just as luscious and satisfying as any traditional frozen treat!
Print
Vanilla Vegan Ice Cream: An Incredible Ultimate Recipe
- Prep Time: 15 minutes
- Cook Time: 10 minutes
- Total Time: 4 hours 25 minutes
- Yield: 6 servings
- Category: Dessert
- Method: Churning
- Cuisine: American
- Diet: Vegan
Description
This ultimate recipe for Vanilla Vegan Ice Cream offers a creamy, dairy-free dessert made from coconut and almond milk, sweetened lightly with organic cane sugar, and enhanced with pure vanilla extract and optional vanilla bean paste. Perfectly churned for a smooth and delicious plant-based treat that’s both satisfying and allergy-friendly.
Ingredients
Ice Cream Base
- 1 can (13.5 ounces) full-fat coconut milk
- 1 cup unsweetened almond milk
- 3/4 cup organic cane sugar
- 2 tablespoons cornstarch
- 1 tablespoon pure vanilla extract
- 1 teaspoon vanilla bean paste (optional)
- 1 pinch salt
Instructions
- Combine Milk and Sugar: In a medium saucepan, whisk together the coconut milk, almond milk, and sugar over medium heat until the sugar dissolves completely.
- Make Cornstarch Slurry: In a small bowl, mix the cornstarch with 2 tablespoons of the milk mixture to form a smooth slurry without lumps.
- Thicken the Mixture: Pour the slurry back into the saucepan and cook, stirring constantly, until the mixture thickens slightly, about 5 to 7 minutes, ensuring it doesn’t burn or stick to the pan.
- Add Flavorings: Remove the saucepan from heat and stir in the pure vanilla extract, optional vanilla bean paste, and a pinch of salt to enhance the flavors.
- Chill the Base: Allow the mixture to cool to room temperature, then cover and refrigerate for at least 4 hours or until completely chilled to prepare for churning.
- Churn the Ice Cream: Pour the chilled mixture into an ice cream maker and churn according to the manufacturer’s instructions until thick and creamy in texture.
- Freeze Until Firm: Transfer the churned ice cream into a freezer-safe container and freeze for 2 to 4 hours to allow it to firm up.
- Serve: Let the ice cream sit at room temperature for 5 minutes before scooping to soften slightly, then serve and enjoy.
Notes
- For a soy-free option, ensure your sugar is certified vegan.
- If you do not have an ice cream maker, pour the chilled mixture into a shallow dish and freeze, stirring every 30 minutes for 3 to 4 hours to break up ice crystals.
- Add mix-ins such as dairy-free chocolate chips or crushed cookies during the last few minutes of churning for added texture and flavor.

