
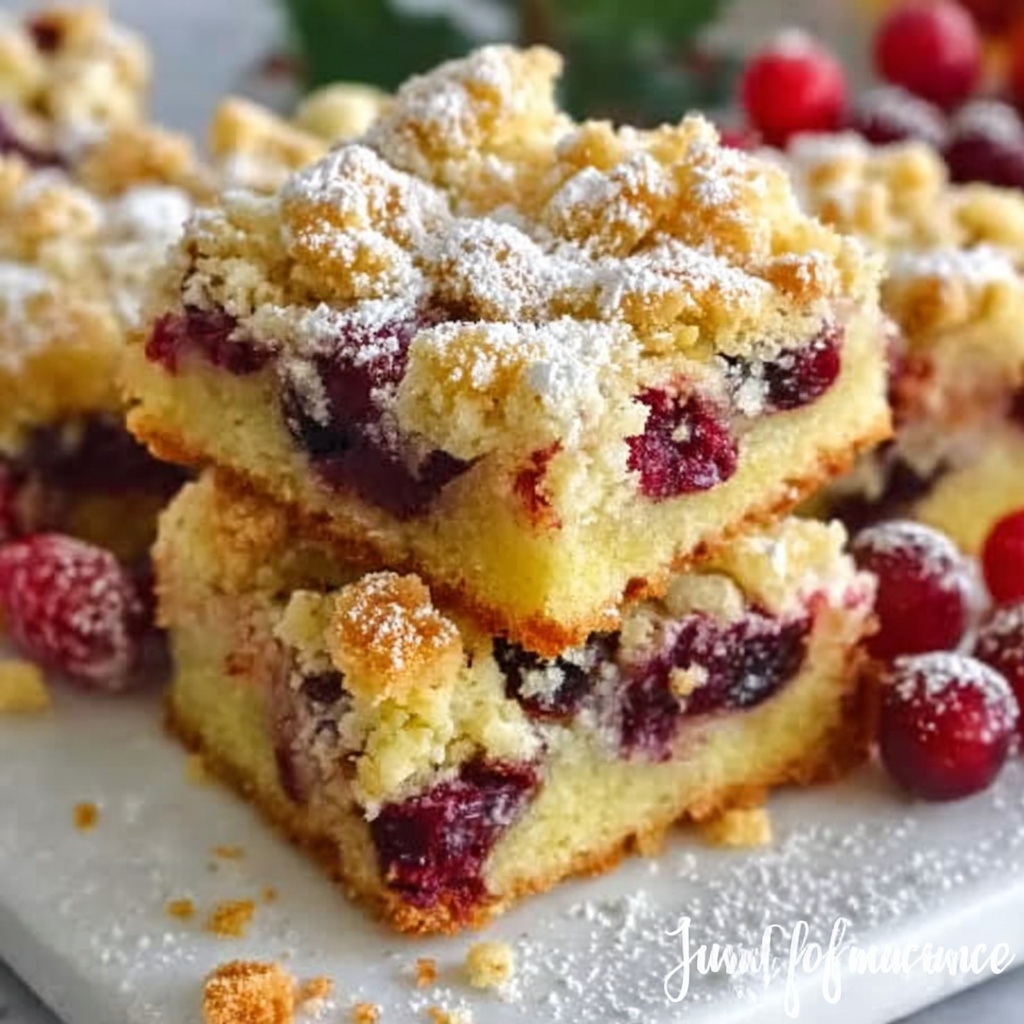
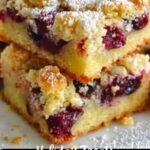
If you’re searching for a festive treat that captures the spirit of the holidays with every bite, look no further than this Christmas Cherry Bars Recipe. Bursting with luscious cherry pie filling nestled between layers of buttery, tender dough and finished with a sweet, almond-infused glaze, these bars are a holiday sensation. They’re perfect for sharing at family gatherings, gifting to friends, or simply savoring with a cup of hot cocoa on a chilly winter evening. Trust me, once you try these bars, they’ll become a treasured seasonal favorite.
Ingredients You’ll Need
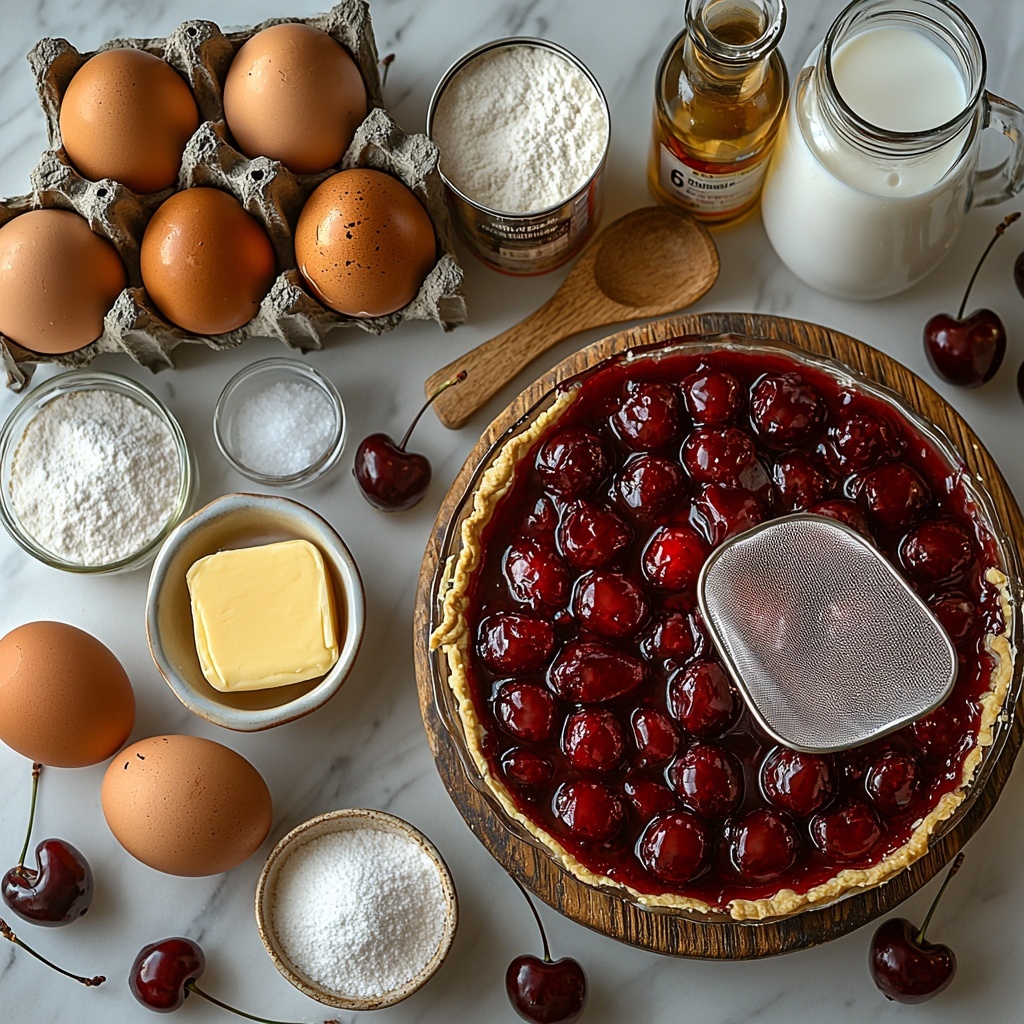
This Christmas Cherry Bars Recipe calls for straightforward ingredients that come together to create magic. Each one plays a crucial role: the butter brings richness, sugar adds sweetness, eggs provide structure, and the almond extract lends a subtle festive aroma. The cherry pie filling is the star, delivering vibrant color and irresistible flavor that makes every bar sing.
- 1 cup butter, softened: Use real butter to get that luscious, rich texture and flavor that no substitute can match.
- 2 cups sugar: Sweetens the dough perfectly, balancing the tartness of the cherries.
- 1 teaspoon salt: Enhances all the flavors so nothing gets lost in the blend.
- 4 large eggs, room temperature: Helps bind the dough while adding moisture for a tender crumb.
- 1 teaspoon vanilla extract: Adds warmth and depth to the dough’s flavor profile.
- 1/4 teaspoon almond extract: Brings a subtle nutty note that pairs beautifully with the cherries.
- 3 cups all-purpose flour: Forms the sturdy but soft base that supports the filling and topping.
- 2 cans (21 oz each) cherry pie filling: The juicy, sweet-tart center that makes these bars unforgettable.
- 1 cup confectioners’ sugar: Key ingredient for the smooth, sweet glaze topping.
- 1/2 teaspoon vanilla extract (for glaze): Enriches the glaze with that classic comforting flavor.
- 1/2 teaspoon almond extract (for glaze): Echoes the dough’s almond hint, tying everything together.
- 2–3 tablespoons whole milk: Adjusts the glaze to the perfect drizzle consistency.
How to Make Christmas Cherry Bars Recipe
Step 1: Prepare Your Pan and Oven
First things first, preheat your oven to 350°F (175°C). Prepare a 15×10-inch sheet pan by spraying it generously with baking spray. This helps the bars release easily later, and it’s essential for ensuring a perfectly baked treat without any sticking or crumbling.
Step 2: Cream Butter, Sugar, and Salt
In a large bowl, cream together the softened butter, sugar, and salt until the mixture is light and fluffy. This step is where the magic starts because you’re incorporating air that will help give the dough a tender, melt-in-your-mouth texture. Use a stand mixer or hand mixer for the best results.
Step 3: Add Eggs and Extracts
Add the eggs one at a time, beating well after each addition. This ensures everything emulsifies properly so the dough isn’t too heavy or greasy. Then stir in the vanilla and almond extracts to infuse that unmistakable holiday aroma.
Step 4: Mix in the Flour
Gradually add the all-purpose flour, mixing just until a dough forms. Be careful not to overmix here because you want the bars to stay nice and tender, not tough. The dough will be a bit thick, almost like cookie dough.
Step 5: Press the Bottom Layer of Dough
Reserve 3 cups of dough and press it evenly into the bottom of your prepared sheet pan. This creates the sturdy yet buttery base that supports the generous cherry filling without getting soggy.
Step 6: Spread Cherry Pie Filling
Open those cans of cherry pie filling and spread the juicy goodness evenly over the pressed dough. This is the flavor-packed heart of the bars, so make sure the cherries cover as much area as possible for that perfect bite every time.
Step 7: Top With Remaining Dough
Take spoonfuls of the remaining dough and gently drop them over the cherry layer. Don’t worry if it doesn’t cover the filling completely; the patches of cherries peeking through create beautiful, inviting bars.
Step 8: Bake Until Golden Brown
Bake in the preheated oven for 35 to 40 minutes until the top turns a golden brown. The aroma that fills your kitchen at this point is pure holiday magic. Once baked, let the bars cool completely right in the pan to set properly before glazing.
Step 9: Make the Glaze
While the bars cool, whisk together confectioners’ sugar, vanilla extract, almond extract, and whole milk in a small bowl until smooth. The glaze should be thick but pourable — add more milk if it’s too stiff or a bit more sugar if too runny.
Step 10: Drizzle and Serve
Drizzle the glaze generously over the cooled bars, allowing it to set to a delicate shine. Once it’s firm, cut into squares and prepare yourself for a burst of sweet, fruity, and buttery holiday bliss!
How to Serve Christmas Cherry Bars Recipe
Garnishes
While these cherry bars are divine on their own, adding a few festive touches can make serving them even more special. A sprinkle of chopped toasted almonds adds a satisfying crunch and extra nuttiness that complements the almond extract wonderfully. Alternatively, a light dusting of powdered sugar can give them a snow-kissed look for a charming holiday presentation.
Side Dishes
These bars pair beautifully with simple sides that don’t compete with their rich flavor. Serve alongside a scoop of vanilla bean ice cream for a festive dessert that feels indulgent yet familiar. For a cozy holiday brunch, offer them with a cup of freshly brewed coffee or a mug of spiced hot chocolate, elevating the experience to full-on seasonal celebration.
Creative Ways to Present
For a stunning holiday party, arrange the Christmas Cherry Bars on a rustic wooden board sprinkled with fresh cranberries and evergreen sprigs. You can also stack a few bars on a pretty cake stand, layering with parchment paper tinted with red or green hues for that extra Christmas cheer. Wrapping individual bars in cellophane and tying with festive ribbons makes for an irresistible homemade gift.
Make Ahead and Storage
Storing Leftovers
If you’re lucky enough to have leftovers, store them in an airtight container at room temperature for up to three days. The bars stay delectably soft and flavorful, though it’s best to keep them out of the fridge so the dough doesn’t dry out.
Freezing
You can freeze these bars if you want to prepare ahead for the busy holiday season. Wrap individual squares tightly in plastic wrap and place them in a freezer-safe container or bag. They’ll keep well for up to two months. Thaw at room temperature before serving.
Reheating
For a just-baked feel, warm leftover bars gently in a low oven (about 300°F) for 5 to 10 minutes or microwave individual servings for 15 to 20 seconds. The glaze may soften slightly, but it adds to the lovely melty texture that tastes like fresh from the oven.
FAQs
Can I use fresh cherries instead of canned pie filling?
Fresh cherries are delicious, but canned cherry pie filling has that perfect thick syrup and sweetness that make these bars extra special. If you prefer fresh, cook them down with sugar and a bit of cornstarch to mimic the pie filling consistency before using.
Is it possible to make this recipe gluten-free?
Absolutely! Substitute the all-purpose flour with your favorite gluten-free baking blend, keeping the measurement the same. Just make sure the blend includes xanthan gum or another binder to keep the dough together nicely.
Can I substitute almond extract with something else?
If almond extract isn’t your favorite, vanilla extract alone works fine, or consider a small amount of orange extract for a citrus twist. The almond is classic for this recipe, but customization is welcome!
How thick should the bars be cut?
Cut the bars into about 2-inch squares for the perfect balance between the dough and cherry filling in each bite. Smaller pieces work well for parties, while larger squares satisfy if serving as a dessert after dinner.
Will these bars stay moist if made a day ahead?
Yes! These cherry bars actually develop better flavor after sitting for a day, as the cherry filling seeps into the dough layers more fully. Just be sure to glaze them right before serving to maintain the freshly drizzled look.
Final Thoughts
This Christmas Cherry Bars Recipe is a heartfelt holiday classic that brings joy to any gathering, big or small. With buttery dough, bursting cherries, and a delicate glaze, each bite feels like a festive hug. I can’t wait for you to make and share these bars with your loved ones—they’re sure to become your go-to Christmas treat year after year!
Print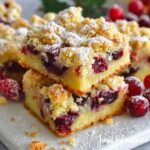
Christmas Cherry Bars Recipe
- Prep Time: 20 minutes
- Cook Time: 40 minutes
- Total Time: 1 hour
- Yield: 24 servings
- Category: Dessert
- Method: Baking
- Cuisine: American
Description
These festive Christmas Cherry Bars combine a buttery, tender crust with sweet and tangy cherry pie filling, all topped with a smooth vanilla-almond glaze. Perfect for holiday gatherings, these bars offer a delightful balance of flavors and a beautiful presentation in every bite.
Ingredients
For the Dough
- 1 cup butter, softened
- 2 cups sugar
- 1 teaspoon salt
- 4 large eggs, room temperature
- 1 teaspoon vanilla extract
- 1/4 teaspoon almond extract
- 3 cups all-purpose flour
For the Filling
- 2 cans (21 oz each) cherry pie filling
For the Glaze
- 1 cup confectioners’ sugar
- 1/2 teaspoon vanilla extract
- 1/2 teaspoon almond extract
- 2–3 tablespoons whole milk
Instructions
- Preheat Oven and Prepare Pan: Preheat your oven to 350°F (175°C). Lightly spray a 15×10-inch sheet pan with baking spray to prevent sticking.
- Cream Butter and Sugar: In a large bowl, use a mixer to cream together the softened butter, sugar, and salt until the mixture becomes light and fluffy, ensuring a smooth base for the dough.
- Add Eggs and Extracts: Add the eggs one at a time, beating well after each addition for proper incorporation. Stir in the vanilla and almond extracts to flavor the dough.
- Incorporate Flour: Gradually add the all-purpose flour, mixing just until a dough forms. Avoid overmixing to keep the bars tender.
- Press Base Layer: Press approximately 3 cups of the dough evenly into the bottom of the prepared sheet pan, creating a uniform crust.
- Spread Cherry Filling: Evenly spread both cans of cherry pie filling over the dough layer, covering the surface completely.
- Add Remaining Dough: Drop spoonfuls of the remaining dough over the cherry filling in a scattered pattern, allowing some filling to peek through.
- Bake: Bake the assembled bars in the preheated oven for 35-40 minutes, or until the dough on top turns golden brown. Remove from oven and allow to cool completely in the pan.
- Prepare Glaze: In a small bowl, whisk together the confectioners’ sugar, vanilla extract, almond extract, and enough whole milk (2–3 tablespoons) to reach a smooth, drizzleable consistency.
- Glaze and Serve: Drizzle the glaze evenly over the cooled bars. Once the glaze has set, cut into squares to serve and enjoy.
Notes
- Make sure the eggs are at room temperature for better incorporation into the dough.
- You can use low-fat milk instead of whole milk for a lighter glaze if preferred.
- Store leftover bars in an airtight container at room temperature for up to 3 days or refrigerate for up to a week.
- For a different flavor twist, substitute cherry pie filling with your favorite fruit pie filling.
- Ensure the bars are completely cooled before glazing to prevent the glaze from melting.


