
“`html
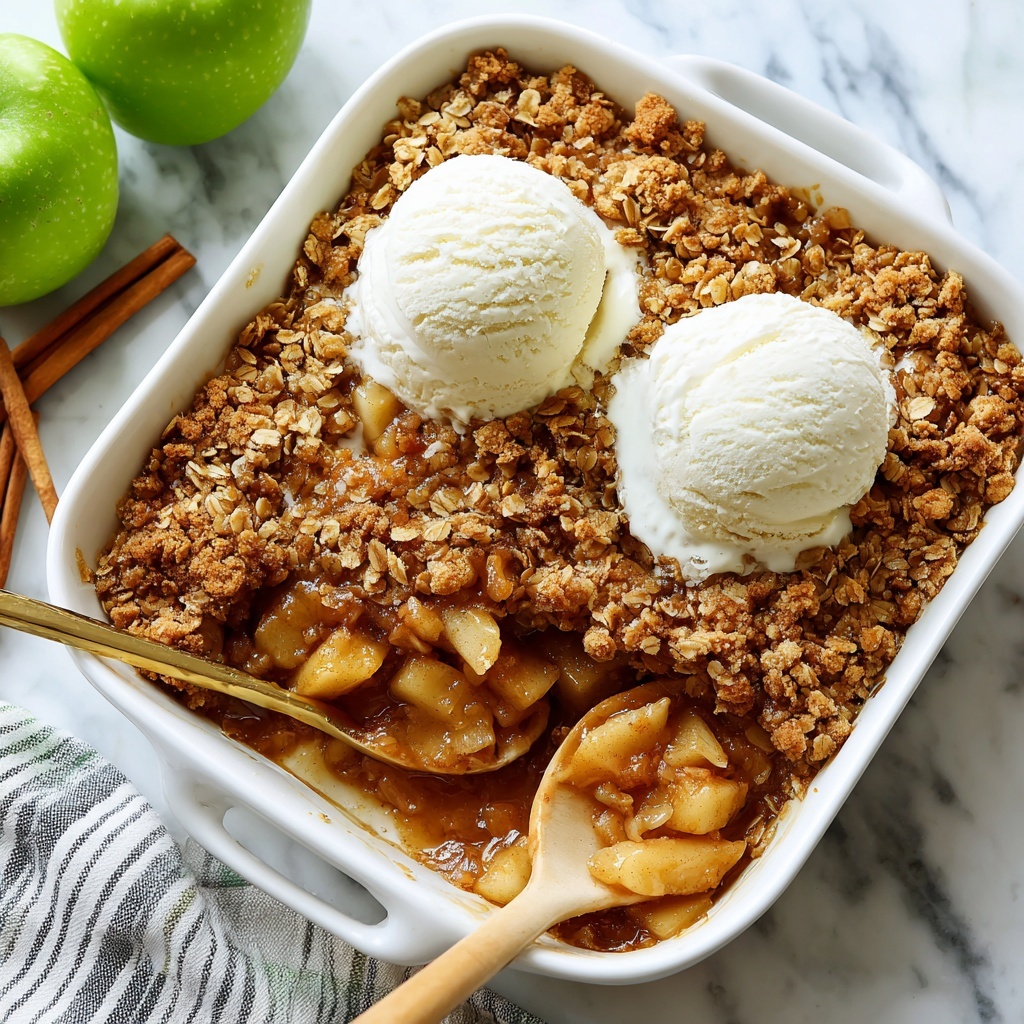
There is something incredibly comforting and timeless about an Apple Crumble Recipe that brings warmth to any kitchen and heart. This dessert blends tender, juicy apples with a perfectly crisp, buttery topping, delivering a sweet and slightly tart bite that’s simply irresistible. Whether you’re gathering for a cozy night in or want to impress guests with a classic treat, this Apple Crumble Recipe is your go-to for a fuss-free, crowd-pleasing dessert that feels homemade and special.
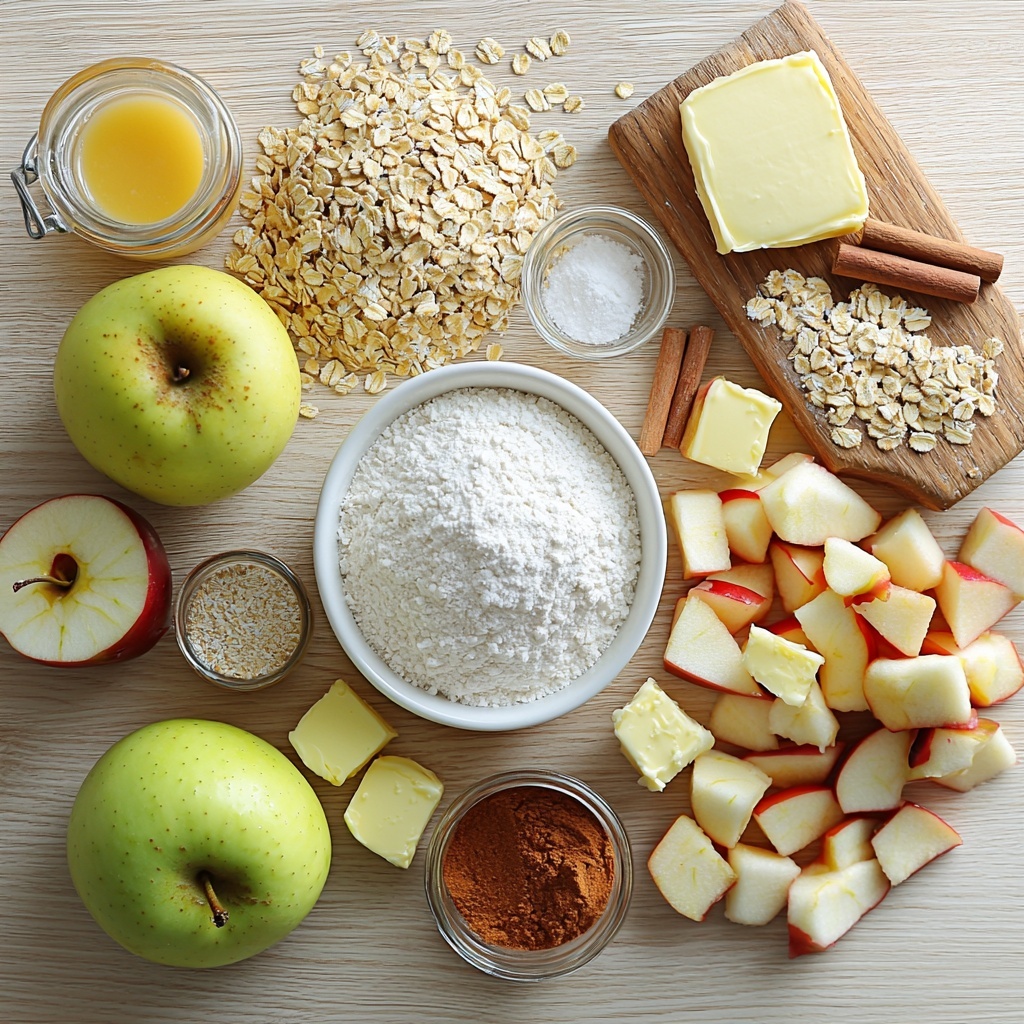
Ingredients You’ll Need
The magic of this Apple Crumble Recipe lies in its simple but carefully chosen ingredients. Each one plays a vital role: the combination of flour, oats, and butter forms a crumbly, crunchy topping, while the apples and a touch of cinnamon create that cozy flavor everyone adores. Here’s exactly what you’ll need to make this dessert shine.
- 1 cup flour: Provides structure and helps bind the crumble topping beautifully.
- 1 cup old-fashioned oats: Adds a rustic texture and a hearty chew to the topping.
- 1 cup light brown sugar (or dark brown sugar): Gives sweetness with a hint of molasses depth that complements the apples.
- 2 teaspoons ground cinnamon: Infuses warmth and a characteristic apple pie spice note.
- 1/2 teaspoon baking soda: Helps the topping rise slightly for a lighter texture.
- 1 teaspoon salt: Balances sweetness and enhances overall flavor.
- 3/4 cup unsalted butter (cubed and cold): Essential for a rich, buttery crumble that crisps perfectly.
- 2 to 3 Granny Smith and Honeycrisp apples (2 pounds): The perfect combo of tart and sweet apples for balanced flavor and texture.
- 1 tablespoon lemon juice: Keeps apple pieces fresh and brightens their natural flavor.
- 1/2 cup granulated sugar: Sweetens the apple filling to just the right degree.
- 1 teaspoon ground cinnamon: Boosts the warm spice that pairs so well with baked apples.
- 2 tablespoons cornstarch: Thickens the filling so it’s luscious, not runny.
- 1 teaspoon vanilla extract: Adds a fragrant, cozy aroma that brings the whole dessert together.
How to Make Apple Crumble Recipe
Step 1: Prepare Your Workspace
Start by lining a sheet pan with parchment paper or a silicone baking mat—this makes clean-up a breeze—and lightly grease your baking dish (8 x 8 or 9 x 9 inch). Having this ready means you’re set to assemble quickly and efficiently.
Step 2: Make the Crumble Topping
In a large bowl, mix flour, oats, brown sugar, cinnamon, baking soda, and salt until well combined. Cube your cold butter and blend it into the dry ingredients using a pastry cutter or your fingertips. The goal is to achieve a crumbly texture where the butter pieces are evenly distributed but still visible. Pop this mixture in the fridge while you prep your apple filling; chilling helps keep the butter firm for the perfect crumble.
Step 3: Prepare the Apple Filling
Peel and cube your apples into roughly half-inch pieces to ensure they cook evenly. Toss them in a large bowl with lemon juice, granulated sugar, cinnamon, cornstarch, and vanilla extract. This coating not only seasons the apples but also guarantees a thick, glossy filling that’s bursting with flavor.
Step 4: Assemble Your Crumble
Transfer the apple mixture along with its juices into your greased pan, pressing it down gently to create an even base. Then, sprinkle the chilled crumble topping evenly over the apples—resist the urge to press it down! Chill the whole dish in the fridge for about 20 minutes. This step is crucial for the topping to hold its shape and bake up golden and crisp.
Step 5: Bake to Perfection
While chilling, preheat your oven to 350°F. Place the assembled dish on the lined sheet pan and bake for 40 to 50 minutes until the topping is a beautiful golden brown, the apples are tender, and the filling bubbles gently at the edges. If the topping starts browning too fast, cover it loosely with foil to prevent burning.
Step 6: Cool and Serve
Let your Apple Crumble Recipe cool for 15 to 20 minutes before serving—this is key to letting the filling set just right so it’s not too runny. The smell alone at this point is downright intoxicating, promising the delicious bites to come.
How to Serve Apple Crumble Recipe
Garnishes
A scoop of vanilla ice cream or a dollop of freshly whipped cream transforms this Apple Crumble Recipe into an indulgent treat that’s creamy and cool against the warm, spicy crumble. For a little extra zing, sprinkle some chopped toasted nuts or a light dusting of cinnamon on top.
Side Dishes
This dessert pairs wonderfully with a hot cup of tea or freshly brewed coffee, making it ideal for relaxed afternoons or after-dinner moments. For a more substantial twist, serve alongside a sharp cheddar cheese slice—yes, cheddar and apple is a classic combo that beautifully contrasts the sweetness.
Creative Ways to Present
For a fun, individual serving style, bake the filling and crumble topping in small ramekins—this makes for a charming presentation when entertaining. You could also spoon the crumble atop thick yogurt or pancake stacks for a creative breakfast or brunch twist.
Make Ahead and Storage
Storing Leftovers
Your Apple Crumble Recipe keeps beautifully in an airtight container in the refrigerator for 3 to 4 days. This allows you to enjoy leftovers without losing that fresh-baked texture and flavor.
Freezing
If you want to stash some crumble for later, freeze the baked crumble in a freezer-safe container for up to 2 months. Make sure it cools completely before wrapping it tightly to prevent freezer burn.
Reheating
To bring your crumble back to life, reheat individual portions in the microwave for a minute or two or warm the entire dish in a 350°F oven until heated through and the topping is crisp again. This gives you that fresh-baked feeling every time.
FAQs
Can I use other types of apples?
Absolutely! While Granny Smith and Honeycrisp apples provide a perfect balance of tartness and sweetness, feel free to experiment with your favorites—just keep in mind some apples are softer and will yield a different texture.
Is it possible to make the crumble topping gluten-free?
Yes, you can substitute the all-purpose flour with a gluten-free flour blend, and use gluten-free oats to maintain the same lovely texture without the gluten.
How do I prevent the crumble topping from becoming soggy?
Chilling the assembled crumble before baking and using cold butter in the topping help create that signature crispness. Baking on a lined sheet pan also helps any juices that bubble over to be contained, protecting the topping texture.
Can I prepare the apple filling in advance?
You can prep the apple filling a few hours ahead and keep it refrigerated, but it’s best to assemble and bake the crumble shortly after mixing to keep the topping crisp and the apples fresh.
What can I substitute for butter if needed?
While butter is key for the best flavor and texture, you can use cold coconut oil or a vegan butter substitute to make this dessert dairy-free, though the crumble may be slightly less rich.
Final Thoughts
This Apple Crumble Recipe is a heartfelt celebration of simple ingredients creating something truly special. It’s an easy dessert that never fails to bring smiles and satisfy cravings, whether for a casual weekend treat or a festive occasion. I encourage you to give it a try—it’s the kind of recipe you’ll want to keep coming back to, again and again.
“`
Print
Apple Crumble Recipe
- Prep Time: 30 minutes
- Cook Time: 50 minutes
- Total Time: 1 hour 20 minutes
- Yield: 6 servings
- Category: Dessert
- Method: Baking
- Cuisine: American
- Diet: Vegetarian
Description
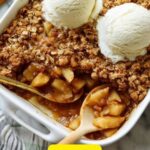
This classic Apple Crumble features a buttery, crunchy oat topping over tender, cinnamon-spiced apples. Perfectly baked to golden perfection, this comforting dessert combines the tartness of Granny Smith and the sweetness of Honeycrisp apples, making it an ideal treat for cozy gatherings or everyday indulgence.
Ingredients
Topping
- 1 cup flour
- 1 cup old-fashioned oats
- 1 cup light brown sugar (or dark brown sugar)
- 2 teaspoons ground cinnamon
- 1/2 teaspoon baking soda
- 1 teaspoon salt
- 3/4 cup unsalted butter (cut into small cubes and cold)
Filling
- 2 to 3 Granny Smith and Honeycrisp apples (2 pounds)
- 1 tablespoon lemon juice
- 1/2 cup granulated sugar
- 1 teaspoon ground cinnamon
- 2 tablespoons cornstarch
- 1 teaspoon vanilla extract
Instructions
- Prepare: Line a sheet pan with parchment paper or a silicone baking mat and lightly grease an 8 x 8 or 9 x 9-inch baking pan to prevent sticking during baking.
- Make Topping: In a large bowl, combine flour, oats, brown sugar, cinnamon, baking soda, and salt. Incorporate the cold cubed butter using a pastry cutter until the mixture becomes crumbly. Press it with fingertips to ensure it holds together in coarse crumbs. Refrigerate the topping while preparing the filling to keep the butter cold.
- Make Filling: Peel and cube the apples into 1/2-inch pieces. In a separate large bowl, toss the apples with lemon juice, granulated sugar, cinnamon, cornstarch, and vanilla extract until the apple cubes are evenly coated, which helps thicken the filling and balance sweetness and tartness.
- Assemble: Transfer the apple mixture along with all juices into the prepared baking pan, spreading and pressing evenly. Sprinkle the chilled crumble topping evenly over the apples without pressing down, then chill the assembled dish in the refrigerator for 20 minutes. Meanwhile, preheat the oven to 350°F (175°C).
- Bake: Place the chilled baking pan on the lined sheet pan and bake in the preheated oven for 40 to 50 minutes, or until the topping is golden brown, the apples are tender, and the filling is bubbling along the edges. If the topping begins to brown too quickly, loosely cover with foil to prevent burning.
- Serve: Allow the apple crumble to cool for 15 to 20 minutes after baking to let the filling thicken slightly. Serve warm, optionally accompanied by vanilla ice cream or whipped cream for extra indulgence.
Notes
- Use a mix of Granny Smith and Honeycrisp apples for the best balance of tartness and sweetness.
- Keeping the butter cold in the topping is key to achieving a crisp, crumbly texture.
- Chilling the assembled crumble before baking helps prevent the topping from sinking into the filling during baking.
- If topping browns too fast, tent loosely with foil to avoid burning.
- Serve with ice cream or whipped cream for a classic pairing.