

If you have ever wanted a quick, satisfying snack that feels like a warm hug from Japan, then you’re in for a treat with the Delicious Onigiri: Japanese Rice Balls You Can Customize Today Recipe. This recipe takes simple, humble ingredients and transforms them into little parcels of joy that are as versatile as they are delicious. Whether you crave a savory bite to keep you going or a charming lunchbox addition, these rice balls are easy to make, endlessly customizable, and downright addictive. Let’s dive into the heart of Japanese comfort food that you can make your own today!
Ingredients You’ll Need
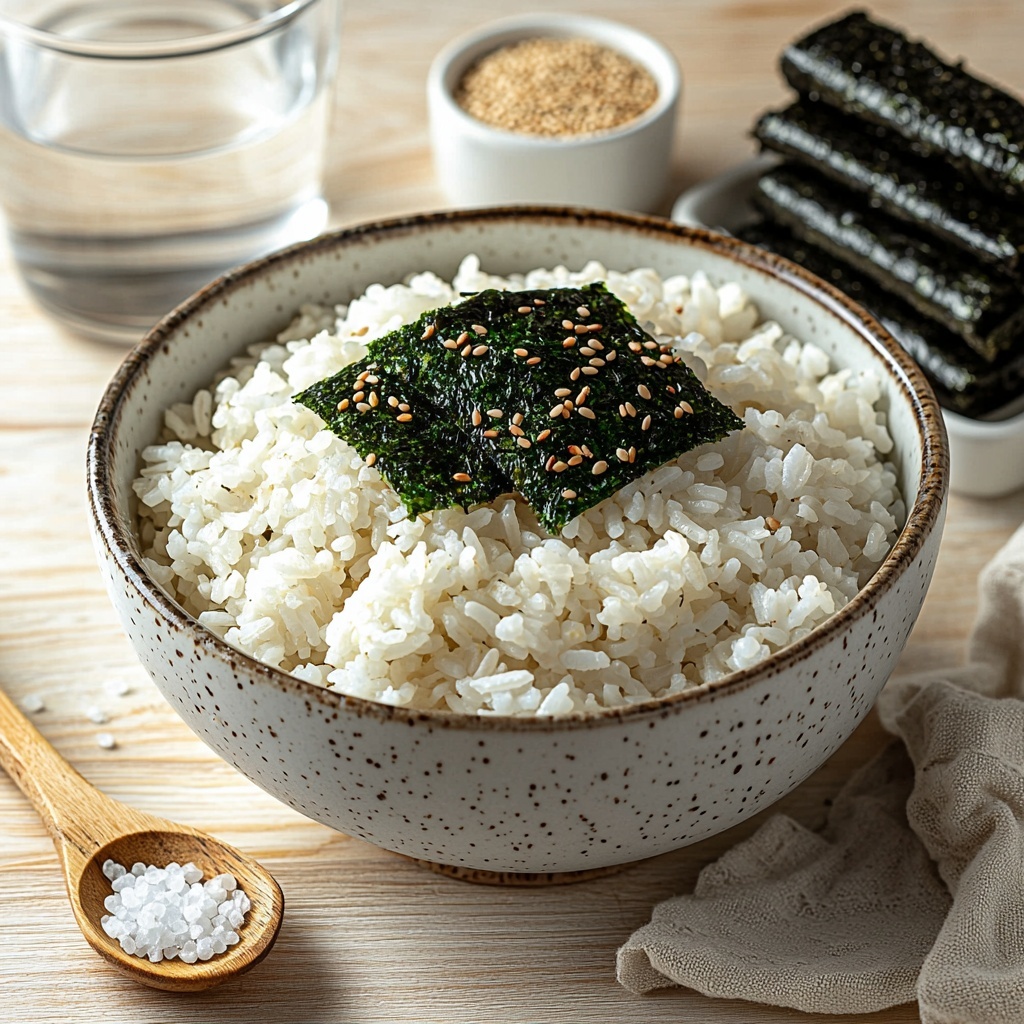
The magic of this Delicious Onigiri: Japanese Rice Balls You Can Customize Today Recipe truly shines through the simplicity of its ingredients. Each item plays a crucial role in achieving that perfect balance of texture and flavor, making your onigiri taste authentic and irresistible.
- 2 cups Cooked Rice: Use freshly cooked medium-grain rice for the ideal sticky texture that holds shape beautifully.
- 2 tablespoons Furikake: A flavorful Japanese seasoning blend that adds an umami punch and colorful speckles to your rice.
- 1 cup Water: Used for wetting your hands to prevent the rice from sticking while shaping your onigiri.
- 1 teaspoon Kosher Salt: Enhances the natural sweetness of the rice and seasons the outside of the balls perfectly.
- 4 sheets Roasted Nori: Cut into strips to wrap around your onigiri, adding a crisp, savory contrast.
- 2 tablespoons Sesame Seeds (optional): Sprinkle on top for a delicate nutty crunch and visual appeal.
How to Make Delicious Onigiri: Japanese Rice Balls You Can Customize Today Recipe
Step 1: Mix the Rice and Furikake
In a large mixing bowl, start by gently folding the freshly cooked medium-grain rice with the furikake seasoning. This step infuses the entire batch with that signature umami flavor and a delightful texture that keeps every bite interesting.
Step 2: Prepare Your Hands
Wet your hands with the water provided to prevent rice from sticking to your skin. Before you scoop up the rice, sprinkle a pinch of kosher salt on your palms — it seasons the outer layer of the onigiri and adds a subtle touch of saltiness that complements the filling perfectly.
Step 3: Shape the Onigiri
Take about half a cup of the seasoned rice and gently but firmly press it into a triangle shape using your hands. This classic shape isn’t just traditional; it also makes the onigiri easy to hold and eat. Press the sides lightly against a flat surface if you want sharper edges and a uniform look.
Step 4: Wrap with Nori
Take a strip of roasted nori and wrap it neatly around the base of your rice triangle. This not only makes the onigiri easier to handle but also adds a delicious contrast of textures and flavors. If you love a bit of extra crunch and nuttiness, sprinkle sesame seeds on top at this stage.
Step 5: Serve or Store
You can enjoy your onigiri immediately while it’s fresh and warm or wrap each rice ball tightly in plastic wrap to store for later. The balance of flavor and texture holds up wonderfully, making these perfect for lunchboxes, picnics, or quick snacks on the go.
How to Serve Delicious Onigiri: Japanese Rice Balls You Can Customize Today Recipe
Garnishes
Adding garnishes to your onigiri can elevate them visually and taste-wise. Sprinkle toasted sesame seeds, chopped scallions, or even a tiny dab of Japanese mayo to amp up the flavor. A little pickled ginger on the side adds brightness and refreshes the palate.
Side Dishes
Onigiri pairs beautifully with a variety of light dishes such as miso soup, pickled vegetables, or edamame beans. These sides complement the rice balls without overpowering their delicate balance, making for a well-rounded meal inspired by traditional Japanese cuisine.
Creative Ways to Present
Bring some fun into your presentation by arranging onigiri in a bento box with colorful vegetable sticks, tamagoyaki (Japanese rolled omelet), or even small portions of sashimi. You can also experiment with filling the onigiri with ingredients like cooked salmon, umeboshi (pickled plum), or spicy tuna for a personalized touch everyone will love.
Make Ahead and Storage
Storing Leftovers
If you have leftover onigiri, wrap each one tightly with plastic wrap and keep them in an airtight container in the refrigerator for up to 24 hours. This keeps the rice from drying out and preserves its signature texture, so you can enjoy them fresh the next day.
Freezing
Onigiri freezes remarkably well! Wrap each rice ball individually in plastic wrap and place them in a freezer-safe bag. Frozen onigiri stay good for up to one month, making them a convenient option for busy days when you need a satisfying snack in a hurry.
Reheating
To reheat frozen or refrigerated onigiri, simply unwrap and microwave them for about 30 seconds to 1 minute until warmed through. If you prefer a crispier nori exterior, you can quickly toast the nori separately in a dry pan or microwave it briefly before wrapping it around the reheated rice ball.
FAQs
Can I use different types of rice for onigiri?
Medium-grain rice is recommended for the best texture because it’s sticky enough to hold the shape but not mushy. Short-grain sushi rice also works well, while long-grain rice tends to be too fluffy and less adhesive for forming solid onigiri.
What are some popular fillings for onigiri?
Classic fillings include salted salmon, pickled plum (umeboshi), tuna with mayo, and kombu seaweed. Feel free to get creative and try cooked chicken, spicy cod roe, or even vegetarian options like grilled shiitake mushrooms or avocado.
How do I prevent the rice from sticking to my hands?
Always wet your hands with water before handling the rice, and rub a pinch of salt on your palms. This technique keeps the rice from sticking while seasoning the outside of the onigiri perfectly.
Can onigiri be made vegan or gluten-free?
Absolutely! Ensure your furikake and any fillings are free of animal products or gluten-containing ingredients. Many furikake blends are naturally gluten-free and vegan, just check the label. Use seasoned seaweed and fresh vegetables for tasty plant-based options.
Is onigiri served hot or cold?
Onigiri is delicious eaten warm, fresh from being made, but it’s also commonly served at room temperature or slightly chilled. It makes a fantastic portable snack or meal component perfect for any time of day.
Final Thoughts
There is something truly special about crafting your own Delicious Onigiri: Japanese Rice Balls You Can Customize Today Recipe. It brings together simple ingredients with endless possibilities for flavor and personalization. Whether you’re new to Japanese cuisine or a longtime fan, these little rice triangles are sure to become a staple snack you revisit again and again. So roll up your sleeves and discover just how fun and rewarding making onigiri can be!
Print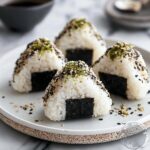
Delicious Onigiri: Japanese Rice Balls You Can Customize Today Recipe
- Prep Time: 10 minutes
- Cook Time: 15 minutes
- Total Time: 35 minutes
- Yield: 4 servings (4 rice balls)
- Category: Snack
- Method: No-Cook
- Cuisine: Japanese
- Diet: Gluten Free
Description
Discover how to make delicious, customizable Japanese Onigiri rice balls with this simple recipe. Freshly cooked medium-grain rice is seasoned with flavorful furikake, shaped into traditional triangles, and wrapped with crisp roasted nori. Perfect as a snack or light meal, these rice balls can be personalized with sesame seeds for added texture and aroma.
Ingredients
Rice Mixture
- 2 cups Cooked medium-grain rice (freshly cooked)
- 2 tablespoons Furikake seasoning blend
- 1 teaspoon Kosher salt (for seasoning)
For Shaping and Wrapping
- 1 cup Water (for wetting hands)
- 4 sheets Roasted Nori, cut into strips
- 2 tablespoons Sesame seeds (optional)
Instructions
- Mix Rice and Seasoning: In a mixing bowl, combine 2 cups of freshly cooked medium-grain rice with 2 tablespoons of furikake seasoning. Mix thoroughly to ensure the rice is evenly coated with umami flavors.
- Prepare Hands for Shaping: Pour 1 cup of water into a small bowl. Wet your hands with the water to prevent sticking, then sprinkle a pinch of kosher salt onto your damp hands to enhance the rice’s flavor as you shape it.
- Shape the Onigiri: Scoop approximately 1/2 cup of the seasoned rice with your salted, wet hands. Gently press and mold the rice into a compact triangle shape, ensuring it holds together well without being overly compressed.
- Refine the Shape: For a cleaner appearance, press the sides of the formed rice triangle against a flat surface, smoothing the edges while maintaining the triangular form.
- Wrap with Nori: Take a strip of roasted nori and wrap it snugly around the base of the rice triangle. This adds both flavor and a convenient handle for eating.
- Add Optional Toppings: If desired, sprinkle 2 tablespoons of sesame seeds over the nori-wrapped base or on top of the rice ball for a nutty finish and additional texture.
- Serve or Store: Enjoy your Onigiri fresh for the best texture and taste, or individually wrap each rice ball in plastic wrap to keep them moist for later consumption.
Notes
- Use freshly cooked medium-grain rice for best texture and stickiness.
- Wetting your hands is crucial to prevent rice from sticking during shaping.
- Adjust the amount of furikake seasoning according to your taste preferences.
- Sesame seeds add a nice crunch but are optional.
- Onigiri is best enjoyed immediately but can be stored wrapped in plastic wrap for up to 24 hours.
- Feel free to add fillings such as pickled plum, tuna mayo, or grilled salmon inside the rice for added flavor.

