
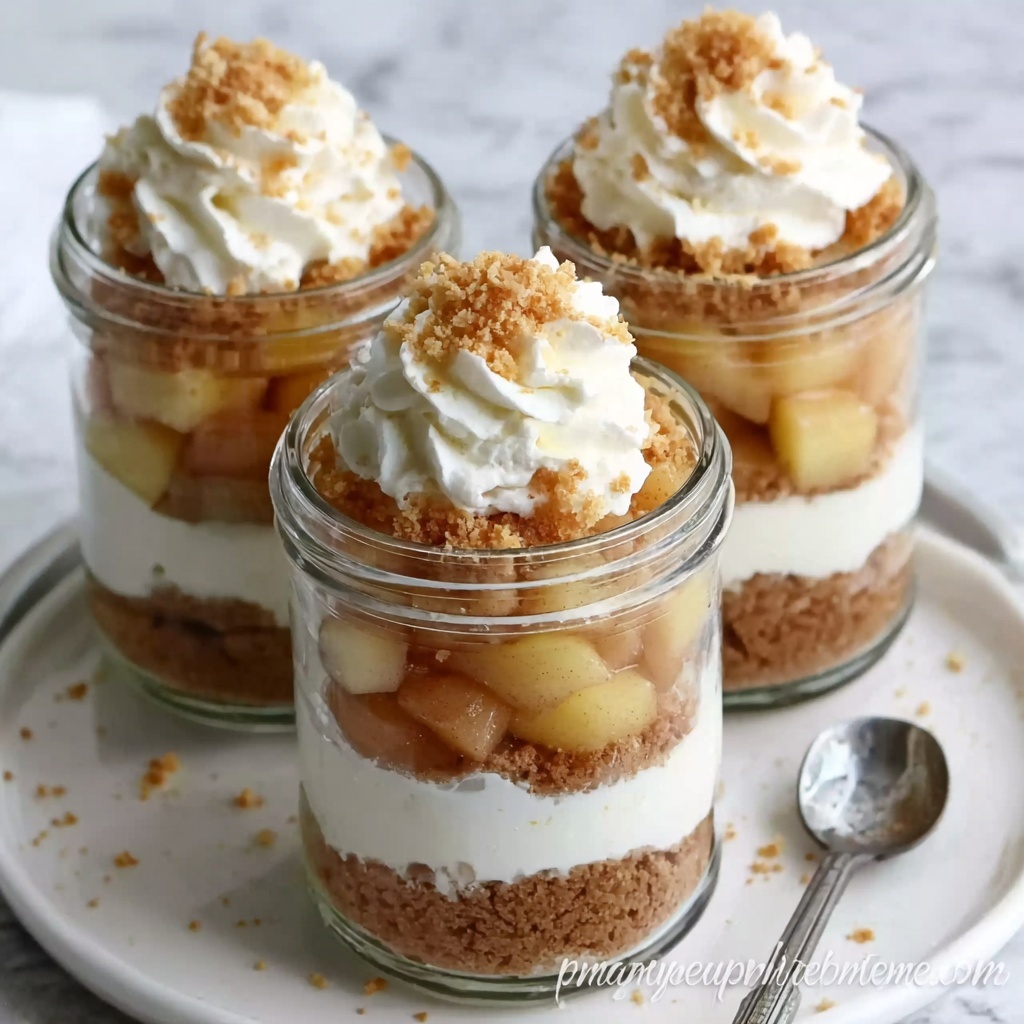
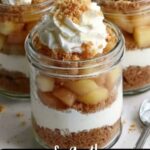
There is something irresistibly charming about this No-Bake Apple Cheesecake Jars Recipe that makes it an absolute favorite for cozy afternoons and festive gatherings alike. Imagine layers of buttery graham cracker crust, luxuriously creamy cheesecake filling, and warm, cinnamon-spiced apple compote all nestled beautifully inside a jar. This dessert brings together the best textures and flavors of classic cheesecake and apple pie without ever requiring the oven, making it a convenient yet impressive treat you’ll want to share with everyone.
Ingredients You’ll Need
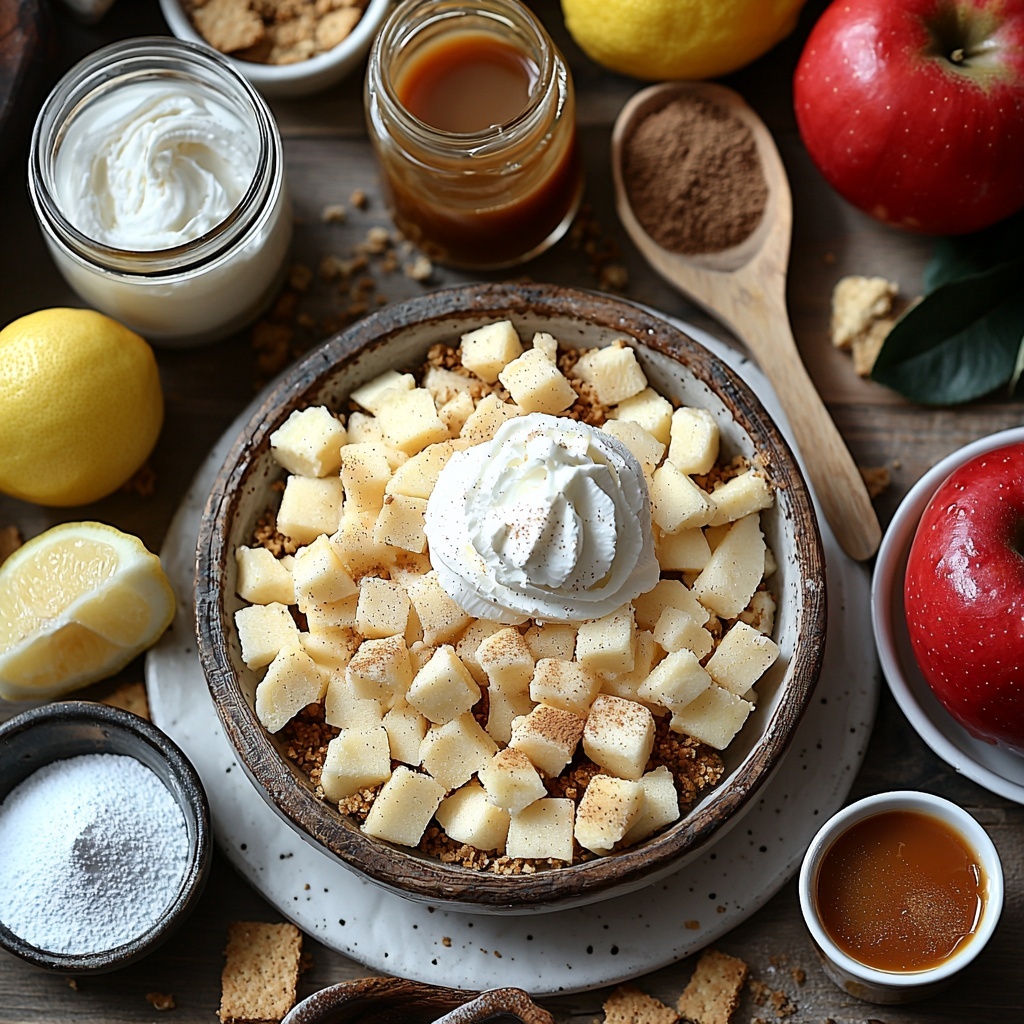
Crafting the perfect No-Bake Apple Cheesecake Jars Recipe starts with a handful of simple ingredients, each playing a crucial role. From the crunchy base to the velvety filling and the fragrant apple topping, these essentials come together effortlessly to create layers of flavor and texture.
- 1 cup graham cracker crumbs: Provides the crunchy, slightly sweet foundation that holds everything together.
- 2 tablespoons granulated sugar: Adds a touch of sweetness to balance the crust.
- 4 tablespoons unsalted butter, melted: Binds the crust ingredients and adds richness.
- 8 ounces cream cheese, softened: The heart of the cheesecake layer, offering creaminess and tang.
- 1 cup heavy cream, chilled: Whipped to stiff peaks for that light, airy texture in the filling.
- ½ cup powdered sugar: Sweetens the cheesecake filling without graininess.
- 1 teaspoon vanilla extract: Delivers a warm undertone to the creamy layer.
- 2 medium apples, peeled, cored, and diced: The star ingredient for the spiced topping, providing freshness and crunch.
- 2 tablespoons unsalted butter: Used to sauté the apples, enhancing their flavor.
- 2 tablespoons brown sugar: Adds caramel notes to the apple topping.
- ½ teaspoon ground cinnamon: Infuses the apples with warm spice.
- 1 teaspoon lemon juice: Brightens the apple mixture and balances sweetness.
- Whipped cream: For garnish, adding extra indulgence and visual appeal.
- Crushed graham crackers: Sprinkled on top for crunch and decoration.
- Caramel sauce: Optional drizzle that brings a luscious finishing touch.
How to Make No-Bake Apple Cheesecake Jars Recipe
Step 1: Prepare the Crust
Start by combining graham cracker crumbs, granulated sugar, and melted butter in a bowl. Mix well until the crumbs are evenly coated and hold together when pressed. This mixture forms the deliciously crunchy base of your jars. Press it firmly into the bottom of each jar or serving glass to create a solid foundation for the layers to come.
Step 2: Make the Cheesecake Layer
Next, beat the softened cream cheese until completely smooth and creamy—this prevents lumps in your filling. In a separate chilled bowl, whip the heavy cream to stiff peaks, which will add that airy fluffiness we adore. Gently fold the whipped cream into the cream cheese along with the powdered sugar and vanilla extract. The combination creates a dreamy, velvety cheesecake layer that’s light and indulgent.
Step 3: Prepare the Apple Topping
Now it’s time to cook your apples into a spiced compote. Melt butter in a skillet over medium heat, then add the brown sugar, ground cinnamon, and diced apples. Let this mixture cook for 5 to 7 minutes until the apples soften and become tender yet still hold their shape. Stir in the lemon juice to brighten the flavors, then allow the mixture to cool slightly before assembling your jars.
Step 4: Assemble the Jars
Layering your dessert is where the magic happens. Start by spooning the cheesecake mixture over the graham cracker crust at the bottom of each jar. Then add a generous layer of the apple compote on top. If you want a more dramatic presentation, repeat the layering one more time. These alternating textures and flavors in the jars create a stunning treat that’s as beautiful as it is delicious.
Step 5: Garnish and Chill
Finish off by adding a dollop of whipped cream to each jar and sprinkling crushed graham crackers over the top for extra crunch. A drizzle of caramel sauce is a decadent bonus that elevates your jars to next-level indulgence. Place the jars in the refrigerator and chill for at least one hour—this allows the dessert to set perfectly and the flavors to meld together.
How to Serve No-Bake Apple Cheesecake Jars Recipe
Garnishes
Whipped cream, crushed graham crackers, and a drizzle of caramel sauce are classic garnish choices that add contrast in flavor and texture. For a seasonal twist, sprinkle a little extra cinnamon or add chopped toasted nuts like pecans or walnuts to introduce a delightful crunch.
Side Dishes
This dessert is wonderfully satisfying on its own but pairs beautifully with a cup of hot coffee, spiced chai, or a glass of chilled apple cider. A scoop of vanilla ice cream alongside your jar can also make for a special treat that complements the creamy, fruity layers.
Creative Ways to Present
If you want to impress guests, try serving these cheesecake jars in mini mason jars or clear glasses to showcase the gorgeous layering. Adding a cinnamon stick or a thin apple slice as a decorative element on top can turn your simple jars into charming gifts or party favors.
Make Ahead and Storage
Storing Leftovers
Keep any leftover No-Bake Apple Cheesecake Jars Recipe refrigerated in airtight containers to maintain freshness. They should stay delicious for up to 3 days, making them perfect for preparing in advance or enjoying as a make-ahead dessert.
Freezing
While this dessert is best fresh, you can freeze it for longer storage. Place the jars in a freezer-safe container and freeze for up to 1 month. Thaw overnight in the fridge before serving to retain the best texture and flavor.
Reheating
This dessert is best served chilled, so reheating is not recommended. However, if you prefer your apple topping warm, gently warm the apple compote separately on the stovetop before assembling the jars for a cozy, comforting twist.
FAQs
Can I use other types of apples for this recipe?
Absolutely! Varieties like Granny Smith, Fuji, or Honeycrisp all work wonderfully. Granny Smith apples add tartness, while Fuji and Honeycrisp offer natural sweetness and crispness.
Is it possible to make this recipe gluten-free?
Yes, simply substitute the graham cracker crumbs with gluten-free graham crackers or a mix of crushed gluten-free cookies. This way, the recipe remains accessible without sacrificing the delicious texture.
Can I prepare this dessert without heavy cream?
The heavy cream is essential for whipping into stiff peaks and provides the light, fluffy texture to the cheesecake layer. If you want a lighter version, you might try substituting with whipped coconut cream, but the texture will be slightly different.
How long should I chill the cheesecake jars before serving?
Chilling for at least one hour is recommended for the best set and richer flavor. If you have more time, chilling for 3 to 4 hours or overnight will make the layers meld even better.
Can I add other fruits to the apple topping?
Definitely! Pears, berries, or even a handful of dried cranberries can complement the apples beautifully and add exciting flavor dimensions.
Final Thoughts
If you’re looking for a delightful dessert that feels both special and easy, this No-Bake Apple Cheesecake Jars Recipe is a true winner. It’s simple enough to whip up on a weekday yet elegant enough to serve at your next gathering. Give it a try—you’ll be amazed at how such straightforward ingredients come together to create something wonderfully comforting and delicious.
Print
No-Bake Apple Cheesecake Jars Recipe
- Prep Time: 20 minutes
- Cook Time: 10 minutes
- Total Time: 1 hour 30 minutes
- Yield: 6 servings
- Category: Dessert
- Method: Stovetop
- Cuisine: American
- Diet: Vegetarian
Description
These No-Bake Apple Cheesecake Jars are a delightful and easy-to-make dessert featuring layers of graham cracker crust, creamy cheesecake filling, and warm cinnamon-spiced apple topping. Served in individual jars, this recipe offers a perfect balance of textures and flavors, making it ideal for gatherings or a special treat at home without any baking involved.
Ingredients
Crust
- 1 cup graham cracker crumbs
- 2 tablespoons granulated sugar
- 4 tablespoons unsalted butter, melted
Cheesecake Layer
- 8 ounces cream cheese, softened
- 1 cup heavy cream, chilled
- ½ cup powdered sugar
- 1 teaspoon vanilla extract
Apple Topping
- 2 medium apples, peeled, cored, and diced
- 2 tablespoons unsalted butter
- 2 tablespoons brown sugar
- ½ teaspoon ground cinnamon
- 1 teaspoon lemon juice
Garnishes
- Whipped cream
- Crushed graham crackers
- Caramel sauce
Instructions
- Prepare the Crust: In a bowl, combine graham cracker crumbs, granulated sugar, and melted butter until the mixture resembles wet sand. Press this evenly into the bottom of jars or serving glasses to form a firm crust layer.
- Make the Cheesecake Layer: Beat the softened cream cheese in a mixing bowl until smooth and creamy. In a separate chilled bowl, whip the heavy cream until stiff peaks form. Gently fold the whipped cream, powdered sugar, and vanilla extract into the cream cheese until fully combined and fluffy.
- Prepare the Apple Topping: In a skillet over medium heat, melt the butter and add brown sugar, cinnamon, and diced apples. Cook the apples for 5 to 7 minutes, stirring occasionally, until they soften and become tender. Stir in the lemon juice and remove from heat to cool.
- Assemble the Jars: Spoon a layer of the cheesecake mixture over the graham cracker crust in each jar. Top with a layer of the cooked apple compote. Repeat layers if you prefer a taller dessert.
- Garnish and Serve: Finish with a dollop of whipped cream, a sprinkle of crushed graham crackers, and a drizzle of caramel sauce on top. Chill the jars in the refrigerator for at least 1 hour to set before serving.
Notes
- Use a chilled mixing bowl when whipping the cream for better volume and texture.
- Choose tart apples like Granny Smith for a nice balance to the sweet cheesecake layers.
- The dessert can be made a day ahead and refrigerated to develop flavors.
- For a lighter version, you can substitute half-and-half for heavy cream, but the texture will be less creamy.
- Ensure apples cool completely before layering to prevent the cheesecake mixture from melting.