

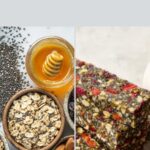
If you’re on the lookout for a wholesome snack that’s bursting with flavor and energy without turning on the oven, this No-Bake Chia Seed Energy Bars Recipe is about to become your new best friend. These bars combine the hearty goodness of rolled oats, the powerful punch of chia seeds, and the natural sweetness of honey or maple syrup to create a perfectly balanced, nutrient-packed bite. They’re simple to make, need no baking time, and are endlessly customizable, making them perfect for a quick breakfast, a midday boost, or a post-workout treat. Trust me, once you try this recipe, you’ll wonder how you ever lived without them!
Ingredients You’ll Need
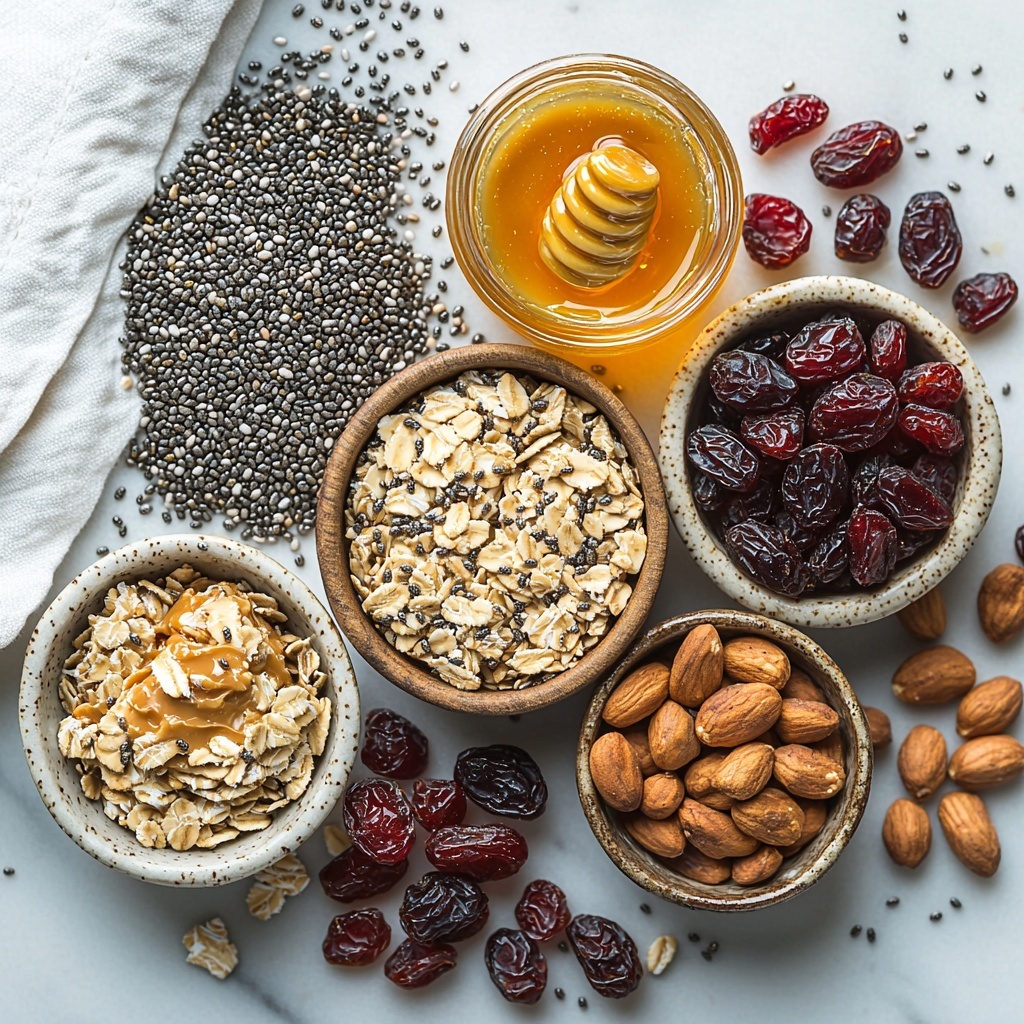
The beauty of this recipe lies in its simplicity, with just a handful of ingredients that you probably already have in your pantry. Each component plays an important role: the oats bring satisfying chewiness, chia seeds add texture and nutrition, peanut butter provides creamy richness, and the nuts and dried fruit add delightful crunch and sweetness.
- Rolled oats: A hearty base that offers chew and fiber to keep you full longer.
- Chia seeds: Tiny but mighty, they provide omega-3s and a subtle crunch.
- Peanut butter: Adds creamy, nutty flavor and binds everything together perfectly.
- Honey or maple syrup: Natural sweetness that helps the bars hold their shape and taste divine.
- Chopped nuts (almonds, walnuts, etc.): Offer crunchy texture and healthy fats.
- Dried fruit (raisins, cranberries, etc.): Little bursts of chewy sweetness that balance out the flavors.
How to Make No-Bake Chia Seed Energy Bars Recipe
Step 1: Mix the Ingredients
Start by grabbing a large bowl where you will combine the rolled oats, chia seeds, peanut butter, honey or maple syrup, chopped nuts, and dried fruit. Use a sturdy spoon or your hands to mix everything thoroughly until you get a sticky, well-combined mixture. This is where all the magic begins as the flavors start to meld together.
Step 2: Press Into the Baking Dish
Line a baking dish with parchment paper or lightly grease it to make removal easier. Transfer the oat mixture into the dish, then press it down firmly and evenly using the back of a spatula or your palms. The firmer you press, the better your bars will hold together once chilled.
Step 3: Chill Until Firm
Place the dish in the refrigerator for at least 2 hours to let the bars solidify. This step is key because chilling helps the peanut butter and honey set, keeping your bars intact and ready to handle without crumbling.
Step 4: Cut and Enjoy
Once firm, lift the mixture out of the dish using the parchment paper. Cut into 12 equal-sized bars or squares with a sharp knife. And just like that, your gorgeous, no-bake, energy-boosting snack is ready to enjoy!
How to Serve No-Bake Chia Seed Energy Bars Recipe
Garnishes
While these bars are perfect on their own, you can elevate their appearance and flavor by sprinkling a few extra chia seeds, crushed nuts, or drizzling a little extra honey or melted peanut butter over the top. Fresh berries served alongside also add a refreshing burst of color and natural sweetness.
Side Dishes
Pairing your energy bars with a cup of herbal tea or a cold glass of your favorite plant-based milk makes for a satisfying snack break. For a heartier option, enjoy them with a dollop of Greek yogurt and sliced banana to create a nourishing mini-meal.
Creative Ways to Present
If you’re packing these bars for the kids or a crowd, consider wrapping each bar individually in parchment paper tied with a colorful string or placing them in a decorative container with labels. They also make fantastic homemade gifts or party favors that everyone will appreciate.
Make Ahead and Storage
Storing Leftovers
Your homemade No-Bake Chia Seed Energy Bars can easily be stored in an airtight container at room temperature for up to a week. Just keep them somewhere cool and dry to prevent any of the natural oils from going rancid. This makes it super convenient to have a healthy snack ready whenever hunger strikes.
Freezing
If you want to keep your bars fresh for longer, pop them in the freezer in a sealed container or freezer bag. They freeze beautifully and can last up to 3 months. When you’re ready to enjoy, just thaw them at room temperature for 10-15 minutes or overnight in the fridge.
Reheating
Since these bars are best enjoyed cool or at room temperature, reheating isn’t usually necessary. However, if you prefer them a touch softer, a few seconds in the microwave will do the trick. Just be careful not to overheat, or they might get too sticky or lose their shape.
FAQs
Can I use almond butter instead of peanut butter?
Absolutely! Almond butter or any other nut butter will work wonderfully and give the bars a slightly different flavor while maintaining that creamy binding texture.
Are these bars gluten-free?
They can be! Just make sure to use certified gluten-free rolled oats to keep the recipe safe for those with gluten sensitivities or celiac disease.
Can I add protein powder to these bars?
Yes, adding a scoop of your favorite protein powder can boost the nutritional profile. Just be sure to adjust the liquid ingredients a bit if the mixture becomes too dry.
How long do these bars last?
Stored properly in an airtight container, your bars can last up to one week at room temperature or up to three months if frozen.
Can I substitute honey with maple syrup?
Definitely! Maple syrup works just as well and makes the bars suitable for vegans. It adds a lovely, slightly different sweetness to the bars.
Final Thoughts
I can’t recommend this No-Bake Chia Seed Energy Bars Recipe enough if you’re looking for a fuss-free snack that tastes amazing and fuels your day. It’s incredibly easy to whip up, endlessly adaptable to your favorite flavors, and a surefire way to keep your energy levels up with wholesome, nourishing ingredients. Give it a try today and prepare to fall in love with your new go-to snack!
Print
No-Bake Chia Seed Energy Bars Recipe
- Prep Time: 10 minutes
- Cook Time: 0 minutes
- Total Time: 2 hours 10 minutes
- Yield: 12 servings
- Category: Snack
- Method: No-Cook
- Cuisine: American
- Diet: Vegetarian
Description
These no-bake chia seed energy bars are a nutritious and easy-to-make snack perfect for a quick energy boost. Packed with wholesome ingredients like rolled oats, chia seeds, peanut butter, nuts, and dried fruit, they provide a balanced mix of protein, fiber, and healthy fats without any cooking required. Ideal for grab-and-go fuel, these bars come together quickly and set in the refrigerator.
Ingredients
Dry Ingredients
- 1 cup rolled oats
- 1/2 cup chia seeds
- 1/2 cup chopped nuts (almonds, walnuts, etc.)
- 1/2 cup dried fruit (raisins, cranberries, etc.)
Wet Ingredients
- 1/2 cup peanut butter
- 1/4 cup honey or maple syrup
Instructions
- Combine Ingredients: In a large bowl, mix together the rolled oats, chia seeds, chopped nuts, dried fruit, peanut butter, and honey or maple syrup until everything is well combined into a sticky, uniform mixture.
- Press Mixture: Transfer the mixture into a lined baking dish and press it down firmly with the back of a spoon or your hands to create an even, compact layer.
- Refrigerate: Place the baking dish in the refrigerator and chill for at least 2 hours or until the mixture is firm and holds together well.
- Slice and Serve: Once set, remove from the fridge and cut into bars of desired size. Enjoy these energy-packed bars as a convenient snack anytime.
Notes
- You can substitute peanut butter with almond butter or any nut butter of your choice.
- For a vegan option, use maple syrup instead of honey.
- Store the bars in an airtight container in the refrigerator for up to one week.
- Add a pinch of salt or cinnamon for extra flavor if desired.
- Feel free to customize the nuts and dried fruit based on your preferences and availability.


