

There is something irresistibly charming about the perfect blend of a rich cake and a tender cookie rolled into one delightful treat. That is exactly what you get with the Red Velvet Blossom Cookies Recipe, a sweet and vibrant confection that bursts with classic red velvet flavor and finishes with a luscious chocolate kiss atop every single cookie. These cookies are not only visually stunning but also delightfully soft and melt-in-your-mouth, making them an absolute crowd-pleaser at any holiday, party, or cozy night in. From the first bite, you’ll understand why this recipe has become a beloved favorite for many baking enthusiasts who want a simple yet impressive dessert to share.
Ingredients You’ll Need
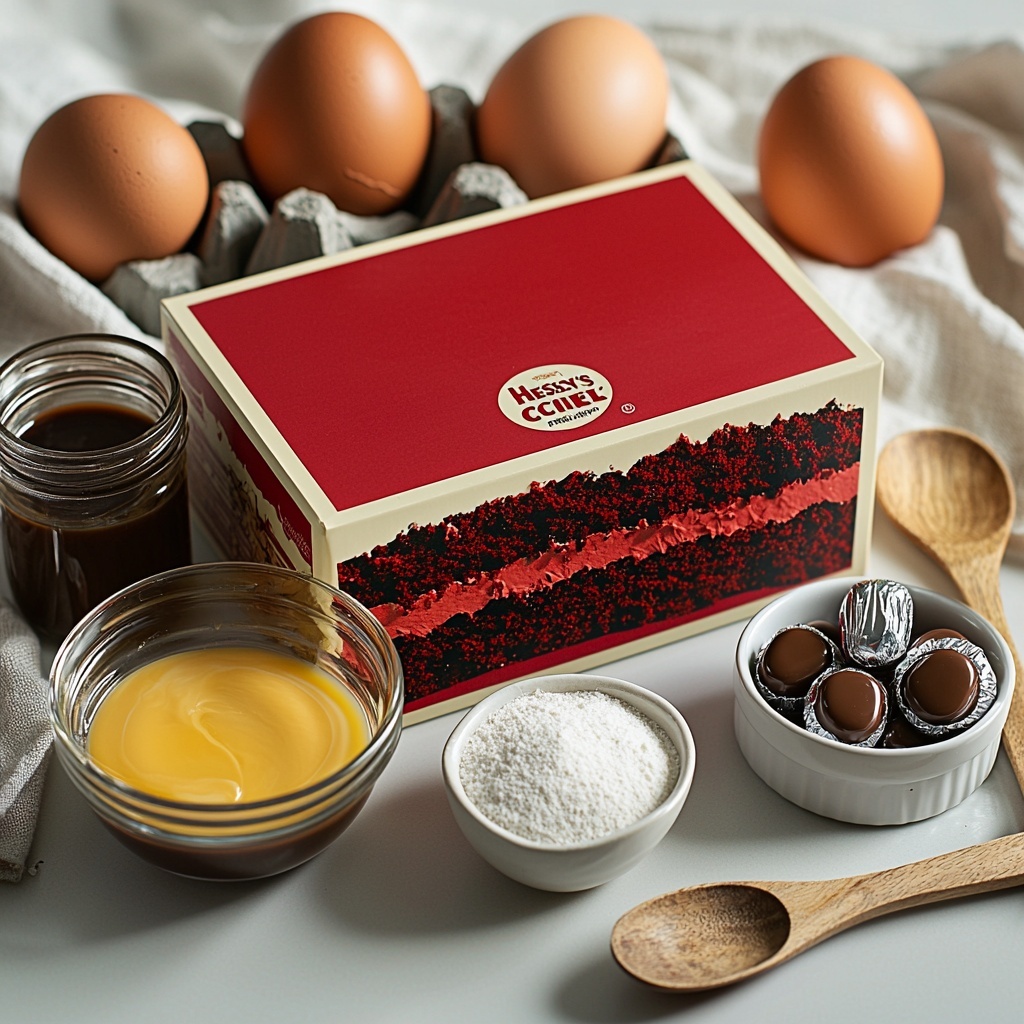
This recipe keeps it wonderfully straightforward without sacrificing that soulful red velvet essence. Each ingredient plays a starring role, ensuring that every cookie is perfectly textured, beautifully colored, and full of comforting flavor.
- Red velvet cake mix (15.25 oz.): The foundation providing that iconic flavor and vibrant color without any fuss.
- Large eggs (2): Essential for binding the ingredients and adding moisture for a tender crumb.
- Unsalted butter (½ cup, melted): Adds richness and the perfect buttery undertone that complements the cake mix.
- Vanilla extract (1 tsp): Enhances all the flavors and adds a subtle aromatic depth.
- Espresso powder (½ tsp, optional): A secret boost that lifts the chocolate notes without making the cookies taste like coffee.
- Regular or coarse sugar (1 cup): Creates that delightful sugary crust when the dough balls are rolled before baking.
- Hershey’s Kisses (24 pieces): The crowning glory on each cookie, introducing a melty chocolate surprise.
How to Make Red Velvet Blossom Cookies Recipe
Step 1: Mix the Wet Ingredients
Start by whisking together the eggs, melted butter, and vanilla extract until everything is fully combined and silky. This trio is the moist base that helps transform the dry cake mix into cookie dough, giving it body and lusciousness.
Step 2: Incorporate the Cake Mix and Espresso
Add in the red velvet cake mix along with the optional espresso powder. Stir everything carefully until you achieve a consistent dough. This step is where the cookies start to come alive with that striking red hue and subtle depth of flavor. The espresso powder is a little trick that makes the chocolate element in the red velvet really pop.
Step 3: Chill the Dough
Pop the dough into the refrigerator for about 30 minutes. This chilling time firms up the dough, making it much easier to roll into neat balls. It also helps control spreading while baking, ensuring your cookies keep their lovely shape.
Step 4: Roll and Coat in Sugar
Once chilled, roll the dough into 1½ inch balls and generously coat each in sugar. This creates the signature crackled sugar crust that adds a pleasant crunch to the tender cookie, offering an inviting texture contrast.
Step 5: Bake to Perfection
Bake the sugar-coated dough balls in a preheated 350°F oven for 8 to 10 minutes. Look for the edges to set while the centers stay soft and puffed up. You’ll also notice the beginnings of crinkling on top—that is your sign to take them out!
Step 6: Add the Chocolate Kiss
Remove the cookies from the oven and immediately press a chocolate Hershey’s Kiss into the center of each warm cookie. Let them cool completely on the baking sheet so the chocolate can gently soften and nestle perfectly into the cookie, completing the signature blossom appearance.
How to Serve Red Velvet Blossom Cookies Recipe
Garnishes
While these cookies are stunning on their own, you can elevate their appearance with a light dusting of powdered sugar or a drizzle of white chocolate for contrast. A sprinkle of festive red and white sugar crystals can also add a sparkling touch, making them absolutely perfect for gift-giving or special occasions.
Side Dishes
Pair these red velvet treats with a cold glass of milk, a frothy cappuccino, or even a scoop of vanilla ice cream for an indulgent dessert experience. Their rich, slightly tangy flavor balances beautifully with creamy accompaniments that complement the chocolate and cocoa undertones.
Creative Ways to Present
Arrange Red Velvet Blossom Cookies on a tiered dessert stand for a party, or wrap stacks of them in cellophane tied with a bright ribbon as charming homemade gifts. You can even sandwich a spoonful of cream cheese frosting between two cookies to create irresistible mini cookie sandwiches for a delightful twist.
Make Ahead and Storage
Storing Leftovers
Store any leftover cookies in an airtight container at room temperature for up to 3 days. This keeps them soft and fresh, while the chocolate kiss remains perfectly intact. Make sure the container is not too airtight if the climate is humid to prevent the sugar crust from becoming soggy.
Freezing
If you want to enjoy these cookies weeks later, they freeze beautifully. Place baked cookies in a single layer on a baking sheet and freeze until solid. Then transfer them to a freezer-safe bag or container with parchment paper between layers. When you’re ready to indulge, thaw at room temperature for a few hours.
Reheating
To revive your cookies, warm them gently in a low oven (about 300°F) for 5 minutes or microwave for 10-15 seconds. This brings back that freshly-baked softness and re-melts the chocolate kiss just a bit for maximum gooey delight.
FAQs
Can I use a different cake mix flavor to make these cookies?
While the magic of this recipe comes from the red velvet flavor, you can experiment with chocolate, vanilla, or other cake mixes. Just keep in mind the texture may vary slightly, and the signature red color will be lost.
What does the espresso powder add to the Red Velvet Blossom Cookies Recipe?
The espresso powder is subtle but powerful; it enhances the chocolate notes without tasting like coffee. It elevates the overall flavor, making the cookies taste richer and more complex.
Why do I need to chill the dough before baking?
Chilling the dough firms it up, making rolling easier and helping the cookies hold their shape during baking. It also reduces spreading which ensures a pretty, plump blossom shape.
Can I substitute the Hershey’s Kisses with other candies?
Absolutely! Mini chocolate chips, peanut butter cups, or even colored candy melts can work well. Just be mindful that some candies melt differently and may affect appearance and texture slightly.
How do I prevent the chocolate kiss from melting too much?
If you use Hugs or other candy kisses that melt more readily, cool the cookies in the fridge or freezer right after pressing the candy into the centers to help set them quickly and keep their shape.
Final Thoughts
If you’re searching for a charming, easy-to-make treat that combines the nostalgic taste of red velvet with the fun of a blossom cookie, this Red Velvet Blossom Cookies Recipe is your new go-to. The vibrant color, tender texture, and chocolatey center come together so beautifully, you’ll find yourself making these cookies again and again. I can’t wait for you to try them and share the joy they bring with your friends and family!
Print
Red Velvet Blossom Cookies Recipe
- Prep Time: 15 minutes
- Cook Time: 10 minutes
- Total Time: 50 minutes
- Yield: 24 cookies
- Category: Dessert
- Method: Baking
- Cuisine: American
Description
These Red Velvet Blossom Cookies are a delightful twist on classic red velvet cake, transformed into soft, tender cookies with a luscious chocolate kiss center. Perfectly sweet and festive, they feature a rich red hue, a hint of espresso for depth, and a crunchy sugar coating. Ideal for holiday treats or special occasions, these cookies combine cake mix convenience with homemade charm.
Ingredients
Cookie Dough
- 1 box red velvet cake mix (15.25 oz.)
- 2 large eggs
- ½ cup unsalted butter, melted
- 1 tsp vanilla extract
- ½ tsp espresso powder (optional)
Coating and Topping
- 1 cup regular or coarse sugar
- 24 Hershey’s Kisses candies (or other mini chocolate candies)
Instructions
- Prepare Dough: Whisk together the eggs, melted butter, and vanilla extract in a mixing bowl until well combined. Add the red velvet cake mix and espresso powder (if using) and stir until the dough is fully incorporated and homogeneous.
- Chill Dough: Cover the dough and chill in the refrigerator for about 30 minutes, allowing it to firm up for easier handling and rolling.
- Form and Coat Cookies: Once chilled, roll the dough into 1½ inch balls. Roll each ball in the sugar to coat evenly, which adds a slight crunch and sweetness to the cookie exterior.
- Bake Cookies: Preheat your oven to 350°F (175°C). Arrange the sugar-coated dough balls on a baking sheet lined with parchment paper or a silicone mat, spaced adequately. Bake for 8-10 minutes, until the cookie edges begin to set, are puffed, and just start to crinkle on top.
- Insert Chocolate Kiss: Remove cookies from the oven and immediately press one Hershey’s Kiss candy into the center of each cookie gently. Let the cookies cool completely; the chocolate will soften and slightly melt into the warm cookie, creating a gooey center.
- Optional Cooling Tips: If using Hugs candy kisses, which may melt more, transfer the cookies to the fridge or freezer after inserting the candy to help them hold their shape. Regular chocolate kisses will set properly at room temperature if left untouched until cooled.
Notes
- Adding espresso powder is optional but enhances the chocolate flavor for a richer taste.
- Chilling the dough is important to make rolling easier and to produce a better cookie texture.
- You can substitute Hershey’s Kisses with other mini chocolate candies if desired.
- Store cookies in an airtight container at room temperature for up to 3 days or refrigerate to extend freshness.
- For a festive touch, use colored sugar or sprinkles instead of plain sugar for coating.


