
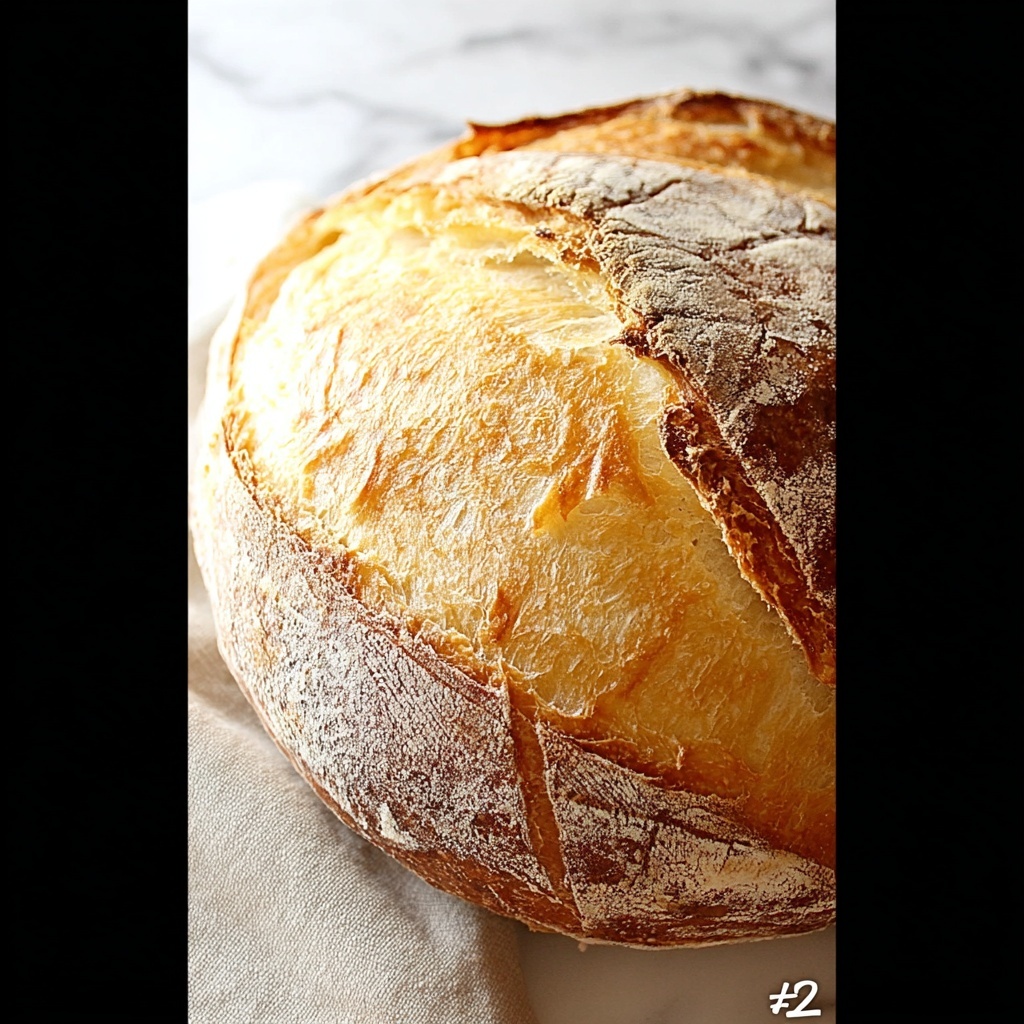
If you have ever dreamed of baking your own crusty, flavorful bread at home, this Rustic German Bread Recipe will quickly become your new favorite. It’s a wonderfully simple loaf with a golden crust and soft, airy crumb that fills your kitchen with an irresistible aroma. Perfect for those cozy mornings or a robust sandwich, this bread combines basic ingredients into a loaf that feels like a warm hug from traditional German baking. Let me walk you through everything you need to know to make this delightful Rustic German Bread Recipe come to life in your oven.
Ingredients You’ll Need
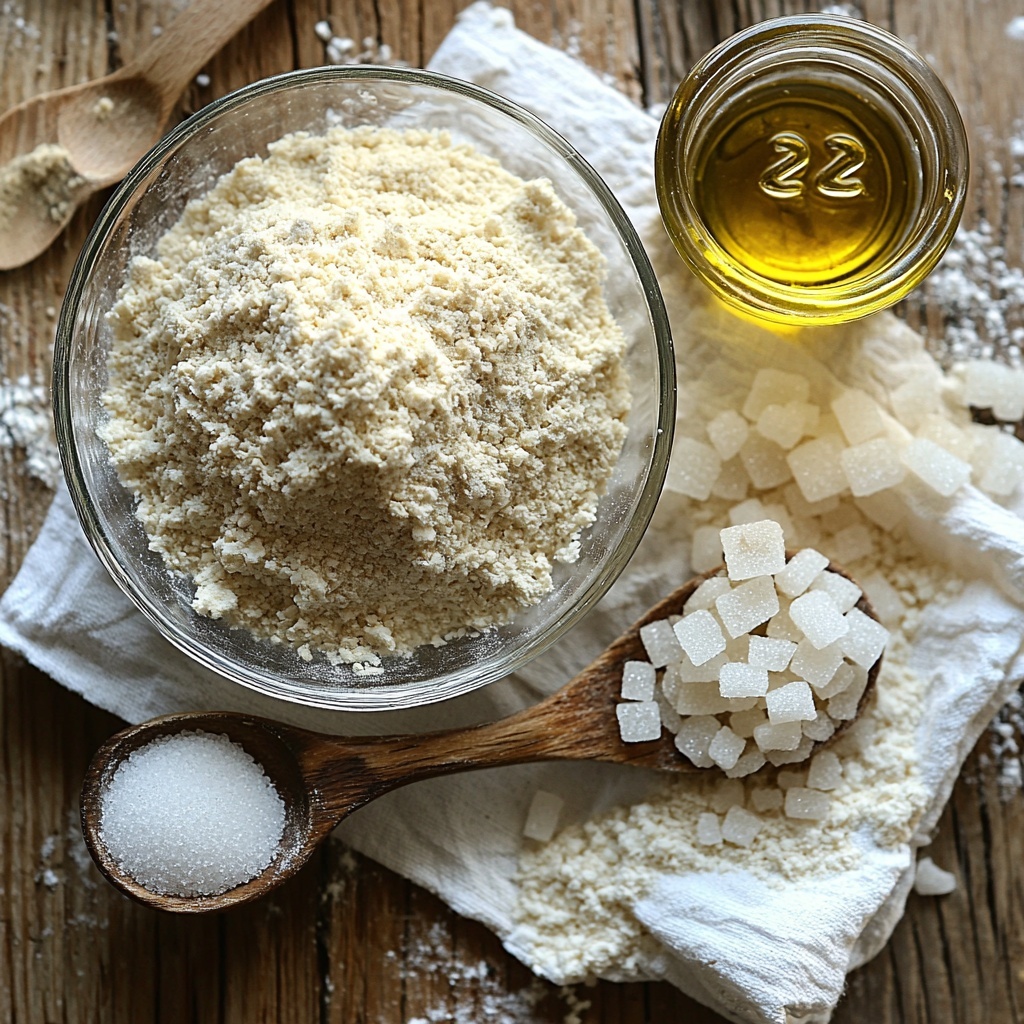
One of the best things about this Rustic German Bread Recipe is how straightforward and essential the ingredients are, making it accessible for any home cook. Each component plays a crucial role: the water hydrates the flour and activates the yeast, sugar feeds the yeast for that perfect rise, sunflower oil adds tenderness and helps with browning, and of course, the flour is the foundation of the bread’s structure and texture.
- 350 ml water (room temperature): Essential for yeast activation and dough formation, room temperature water ensures optimal rising.
- 1 tablespoon sugar: Feeds the yeast to kickstart fermentation and lends a subtle sweetness.
- 8 grams dry yeast: The leavening agent that gives your bread its rise and airy texture.
- 25 ml sunflower oil: Adds moisture and richness while contributing to a tender crumb and golden crust.
- 500 grams flour (plus extra for dusting): The backbone of your bread, providing structure and that satisfying chew.
How to Make Rustic German Bread Recipe
Step 1: Yeast Activation
Begin by combining the water, sugar, and dry yeast in a large bowl. Stir gently until the yeast dissolves completely. Cover the bowl and let it sit for about 5 minutes until it becomes frothy on top. This indicates your yeast is alive and ready to work its magic, which is the foundation of your bread’s rise.
Step 2: Add Oil and Flour
Next, pour in the sunflower oil to the yeast mixture, giving it a gentle stir to combine the fat evenly. Gradually sift in the flour while stirring. This slow addition helps you avoid lumps and ensures the flour is fully integrated into the liquid, leading to a more uniform dough.
Step 3: First Rise
Once your dough has come together and feels sticky but manageable, cover it again and set it in a warm spot. Let it rise undisturbed for roughly one hour, or until it has doubled in size. This stage develops the dough’s structure and enhances the flavor through fermentation.
Step 4: Second Mixing
After the first rise, stir the dough gently to release trapped air bubbles. Cover it again and let it rest for an additional 30 minutes. This resting is crucial as it allows the gluten to relax and strengthens the dough’s elasticity, preparing it for shaping.
Step 5: Shape the Dough
Lightly flour your workspace and roll the dough out into a rectangle. Fold the dough over itself to build structure, then let it rest for 10 minutes. This resting period softens the dough, making shaping easier. Afterward, form it into your preferred shape whether it’s a classic loaf, a rustic boule, or smaller rolls.
Step 6: Final Shaping and Baking
Place the shaped dough on a baking tray lined with parchment paper. Using a sharp knife, create decorative slashes on top — these not only look beautiful but help steam escape during baking. Heat your oven to 230°C (446°F) and bake the bread for 30 to 40 minutes until it develops that perfect golden-brown crust.
Step 7: Cool and Serve
Once out of the oven, transfer your bread to a wire rack to cool. This step is important so moisture doesn’t accumulate and make the crust soggy. Enjoy your Rustic German Bread Recipe warm or at room temperature, perfect for slicing and savoring.
How to Serve Rustic German Bread Recipe
Garnishes
This bread shines on its own, but adding a spread of rich butter or a drizzle of herbed olive oil elevates every bite. You could also top slices with sliced cheese, cucumber, or smoked meats for a simple yet impressive snack.
Side Dishes
Rustic German Bread pairs beautifully with hearty soups like potato leek or creamy tomato bisque. It also complements robust stews and cheeses, making it an ideal table companion during dinners or casual lunches.
Creative Ways to Present
For a welcoming touch, serve the bread sliced with a small board of assorted dips, such as garlic herb butter, tapenade, or mustard. You can also hollow out a loaf to use as an edible bread bowl, adding an inviting rustic charm to your table.
Make Ahead and Storage
Storing Leftovers
Store your baked Rustic German Bread Recipe in a paper bag or wrapped loosely in a kitchen towel at room temperature to maintain its crust. It will stay fresh and flavorful for 3 to 4 days—just avoid plastic as it traps moisture and softens the crust.
Freezing
If you want to enjoy this bread at a later date, slice it and place it in an airtight freezer bag. It can be frozen for up to 3 months without losing its delightful texture or flavor.
Reheating
When you’re ready to eat frozen bread, thaw it overnight at room temperature. Refresh the crust by warming it in a preheated oven at 180°C (350°F) for 10–15 minutes. This brings back the crunch and the fresh-baked aroma you love.
FAQs
Can I use whole wheat flour instead of regular flour?
Absolutely, but keep in mind that whole wheat flour absorbs more liquid and can produce a denser bread. You might want to substitute half of the white flour with whole wheat for a balanced texture and richer flavor.
Do I need to knead the dough?
In this Rustic German Bread Recipe, stirring the dough and letting it rest builds enough gluten for structure, so traditional kneading isn’t necessary. This makes it wonderfully simple without sacrificing texture.
Can I bake this bread without an oven thermometer?
Yes, while an oven thermometer helps with accuracy, you can rely on your oven’s settings. Just preheat fully to 230°C (446°F) and pay close attention to the bread’s crust color and bake time.
How can I tell when the bread is done baking?
The bread should be a deep golden brown with an audible hollow sound when tapped on the bottom. This indicates it’s nicely baked through with a crisp crust.
What can I do if my bread doesn’t rise well?
Make sure your yeast is fresh and that the water is at room temperature—not too hot or cold. Also, give the dough enough time in a warm spot to rise. Sometimes certain climates need a longer rising time for best results.
Final Thoughts
There’s something truly special about baking your own bread, and this Rustic German Bread Recipe captures the charm of traditional baking with kindness to your time and ingredients. Once you make it, you’ll be hooked on that perfect crust and soft crumb combo, eager to share this homemade joy with friends and family. So preheat your oven and get ready to fill your kitchen with the warm, inviting scent of freshly baked bread—you’ll be so glad you tried it.
Print
Rustic German Bread Recipe
- Prep Time: 10 minutes
- Cook Time: 35 minutes
- Total Time: 1 hour 45 minutes
- Yield: 1 loaf (approx. 8 slices)
- Category: Bread
- Method: Baking
- Cuisine: German
- Diet: Vegetarian
Description
This Rustic German Bread recipe produces a hearty, crusty loaf with a tender crumb perfect for sandwiches or enjoying with butter. Made from simple ingredients like flour, water, yeast, and sunflower oil, this bread undergoes two rises and baking at high heat for a golden crust and rustic appearance.
Ingredients
Yeast Mixture
- 350 ml water (room temperature)
- 1 tablespoon sugar
- 8 grams dry yeast
Dough
- 25 ml sunflower oil
- 500 grams all-purpose flour (plus extra for dusting)
Instructions
- Yeast Activation: In a large bowl, combine 350 ml of room temperature water with 1 tablespoon of sugar and 8 grams of dry yeast. Stir until dissolved, then cover the bowl and let the mixture sit for 5 minutes until it becomes frothy, indicating the yeast is active.
- Add Oil and Flour: Pour 25 ml of sunflower oil into the yeast mixture. Gradually sift in 500 grams of all-purpose flour while stirring to combine until a sticky dough forms.
- First Rise: Cover the dough and place it in a warm spot. Let it rise for 1 hour or until it has doubled in size, allowing the yeast to ferment and develop flavor.
- Second Mixing: Stir the risen dough to release trapped air, then cover again and let it rest for an additional 30 minutes. This resting period helps gluten development for a better texture.
- Shape the Dough: Lightly flour your work surface. Roll the dough into a rectangle, then fold it before letting it rest for 10 minutes. Shape the dough into your preferred form—loaf, boule, or rolls.
- Final Shaping and Baking: Place the shaped dough onto a lined baking tray. Use a knife to make decorative slashes on the surface to allow for expansion during baking. Preheat your oven to 230°C (446°F) and bake the bread for 30 to 40 minutes until it is golden brown and crusty.
- Cool and Serve: Remove the bread from the oven and transfer it to a wire rack to cool. Enjoy the bread warm or at room temperature for the best flavor and texture.
Notes
- Make sure the water is at room temperature to properly activate the yeast without killing it.
- You can substitute sunflower oil with olive oil if preferred for a different flavor.
- Allowing the dough to rest after shaping helps the gluten relax, making it easier to form your desired shape.
- Use a baking stone or cast iron tray if you want an even crispier crust.
- Let the bread cool completely before slicing to avoid a gummy texture inside.


