

If you’ve ever dreamed of capturing the fresh, vibrant flavor of cherries all year round, then you are in for a real treat with this Homemade Cherry Pie Filling Recipe. It’s a wonderfully simple way to turn luscious, juicy cherries into a thick, glossy filling that bursts with balanced sweetness and just the right hint of tartness. Whether you are aiming to create a classic cherry pie or want a versatile fruit topping for your desserts, this recipe is about to become your new kitchen staple, delivering everything you love about cherries in one delightful spoonful.
Ingredients You’ll Need
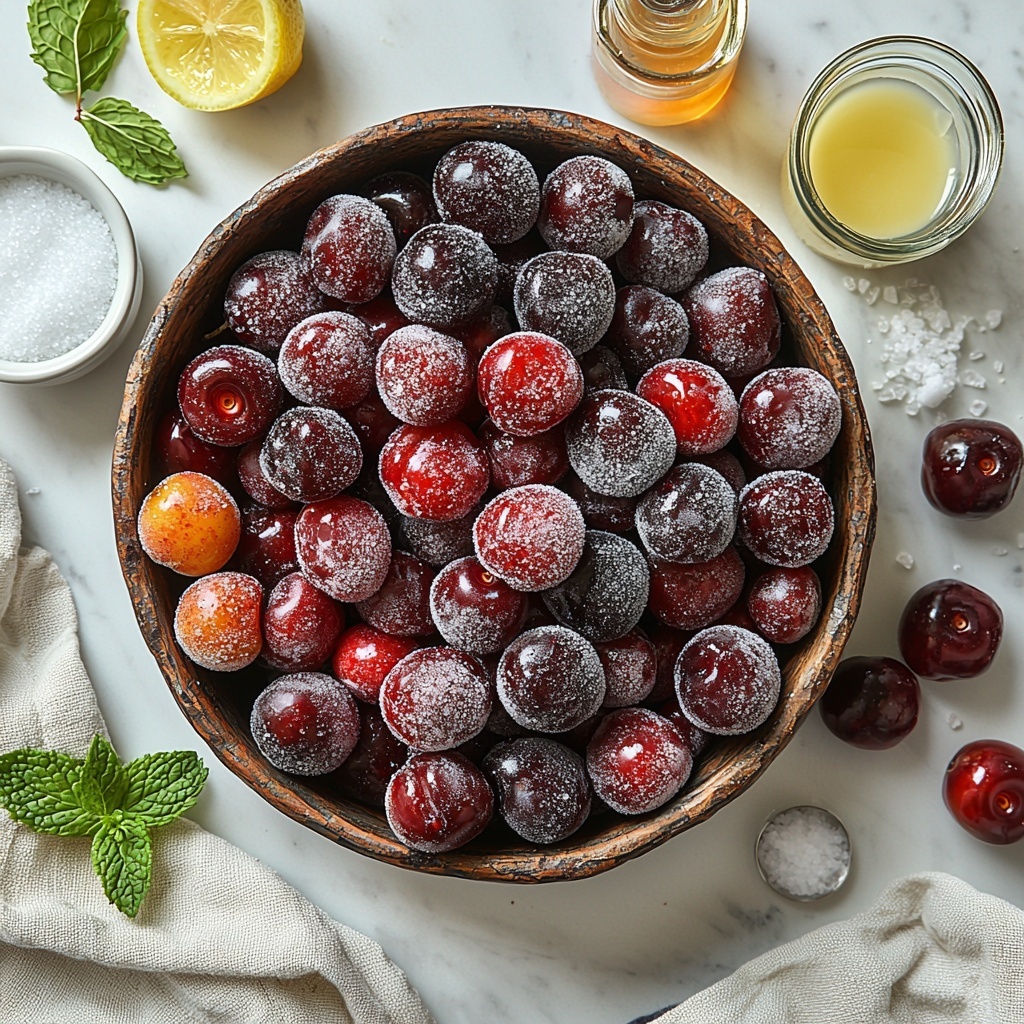
Getting the ingredients right is half the fun, and this recipe uses simple, straightforward components that each play a crucial role. From the natural tartness of fresh cherries to the luscious thickening power of cornstarch, every ingredient is essential in achieving that perfect pie filling texture and flavor.
- 4 cups fresh or frozen cherries, pitted: Your star ingredient providing juicy sweetness and vibrant color.
- 1 cup granulated sugar: Balances the tartness and enhances the cherry’s natural flavor.
- 1/4 cup cornstarch: The secret to thickening the filling while keeping it smooth.
- 1/4 tsp salt: Elevates the flavors, giving depth and balance to the sweetness.
- 1 tbsp lemon juice: Adds brightness and a subtle tang that makes cherries pop.
- 1/2 cup water: Hydrates the filling to help cornstarch dissolve and activate.
- 1/2 tsp almond extract (optional): A small touch for an irresistible nutty aroma that complements cherries beautifully.
How to Make Homemade Cherry Pie Filling Recipe
Step 1: Combine the Ingredients
Start by placing your pitted cherries into a large saucepan. Add the granulated sugar, cornstarch, and salt to the cherries before stirring in the lemon juice and water. This mix creates the foundation for your filling, where each element begins to blend and marry in the saucepan.
Step 2: Cook Until Thickened
Set the saucepan over medium heat and keep stirring frequently. The mixture will slowly come to a gentle bubble — this is when the magic happens. In about 5 to 10 minutes, you’ll notice the filling thickening and glossing over, perfectly coating the cherries and turning into that ideal pie consistency we all crave.
Step 3: Add Almond Extract
If you love extra flavor depth, now is the moment to stir in the almond extract. It’s optional but highly recommended for its warm, nutty notes that play beautifully against the cherry sweetness, transforming the filling into something truly special.
Step 4: Cool Before Using
Once thickened and aromatic, remove the filling from the heat and let it cool. Cooling is key to allowing the filling to set and thicken further, making it easy to spoon into your pie crust, jars, or dessert dishes without any runniness.
How to Serve Homemade Cherry Pie Filling Recipe
Garnishes
Fresh whipped cream is a classic companion that adds creamy richness to this cherry filling. You can also sprinkle some crushed toasted almonds or a dusting of powdered sugar for added texture and a touch of elegance.
Side Dishes
This cherry pie filling pairs wonderfully alongside vanilla ice cream, creamy custards, or simple pound cake slices. Its vibrant flavor and velvety texture can turn even a basic dessert into a celebration on your plate.
Creative Ways to Present
Don’t limit yourself to pie! Use your Homemade Cherry Pie Filling Recipe as a topping for pancakes, as a swirl in yogurt parfaits, or even filled inside thumbprint cookies for a surprising burst of flavor. The possibilities are endless and delicious.
Make Ahead and Storage
Storing Leftovers
Once cooled, store your cherry pie filling in an airtight container in the refrigerator. It will keep fresh and flavorful for up to one week, perfect for making ahead or saving extra for spontaneous dessert cravings.
Freezing
This filling freezes beautifully. Portion it into freezer-safe containers or bags, leaving a little space for expansion. Frozen cherry pie filling can last up to 3 months, making it easy to enjoy your homemade treat any time of year.
Reheating
Reheat gently on the stovetop or in the microwave, stirring occasionally to restore its smooth texture. If needed, add a splash of water to loosen it up, ensuring it’s just as luscious as freshly made.
FAQs
Can I use frozen cherries for this recipe?
Absolutely! Frozen cherries work just as well as fresh ones and can be a convenient option, especially out of season. Just make sure to thaw and drain any excess liquid before cooking for the best results.
Is almond extract necessary in this cherry pie filling?
Almond extract is optional but highly recommended because it enhances the cherry flavor with a subtle nutty aroma. If you prefer a pure cherry taste, feel free to leave it out.
Can I make this pie filling without cornstarch?
Cornstarch is essential here to achieve that perfect thick and glossy texture. Without it, the filling would be too watery. If you don’t have cornstarch, you could try tapioca starch or arrowroot as substitutes.
How sweet is this cherry pie filling?
The recipe is nicely balanced with a cup of sugar, giving a pleasant sweetness that highlights the cherries’ natural tartness without overpowering them. You can adjust the sugar amount to suit your personal taste.
Can I use this filling for other desserts besides pie?
Definitely! This Homemade Cherry Pie Filling Recipe is incredibly versatile. Use it for tarts, cheesecakes, pastries, or simply as a luscious topping for ice cream and yogurt. It’s a fantastic way to add a burst of cherry flavor wherever you like.
Final Thoughts
There’s something truly magical about making your own cherry pie filling from scratch — it’s fresh, flavorful, and filled with love. This Homemade Cherry Pie Filling Recipe is not only easy to prepare but also brings a wonderful homemade touch to any dessert. I can’t wait for you to try it and discover how much joy this simple recipe can bring to your kitchen and your taste buds.
Print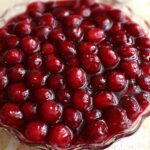
Homemade Cherry Pie Filling Recipe
- Prep Time: 5 minutes
- Cook Time: 10 minutes
- Total Time: 15 minutes
- Yield: 5 servings
- Category: Pie Filling
- Method: Stovetop
- Cuisine: American
Description
This homemade cherry pie filling is a simple and delicious mix of fresh or frozen cherries cooked with sugar, cornstarch, and a hint of lemon juice, creating a thickened, luscious filling perfect for pies and desserts. The optional almond extract adds a subtle, complementary flavor that enhances the cherry taste.
Ingredients
Pie Filling Ingredients
- 4 cups fresh or frozen cherries, pitted
- 1 cup granulated sugar
- 1/4 cup cornstarch
- 1/4 tsp salt
- 1 tbsp lemon juice
- 1/2 cup water
- 1/2 tsp almond extract (optional)
Instructions
- Combine Ingredients: In a large saucepan, mix the pitted cherries, sugar, cornstarch, and salt together. Stir in the lemon juice and water until the mixture is well combined.
- Cook Filling: Place the saucepan over medium heat. Cook the mixture, stirring frequently to prevent sticking, until it starts to bubble and the mixture thickens. This process takes about 5 to 10 minutes.
- Add Almond Extract: If desired, stir in the almond extract to add a subtle nutty flavor to the filling.
- Cool Filling: Remove the saucepan from heat once the mixture is thickened. Allow the cherry pie filling to cool completely before using it in pies or other desserts.
Notes
- For best results, use fresh, ripe cherries in season or high-quality frozen cherries.
- Ensure the cherries are pitted to avoid bitterness and improve texture.
- Cornstarch is key for thickening the filling; adjust slightly if a thicker or thinner consistency is desired.
- The almond extract is optional but recommended for added flavor depth.
- Cool the filling completely before filling pie crust to prevent sogginess.
- Store any leftovers in an airtight container in the refrigerator for up to 5 days or freeze for longer storage.


