
“`html
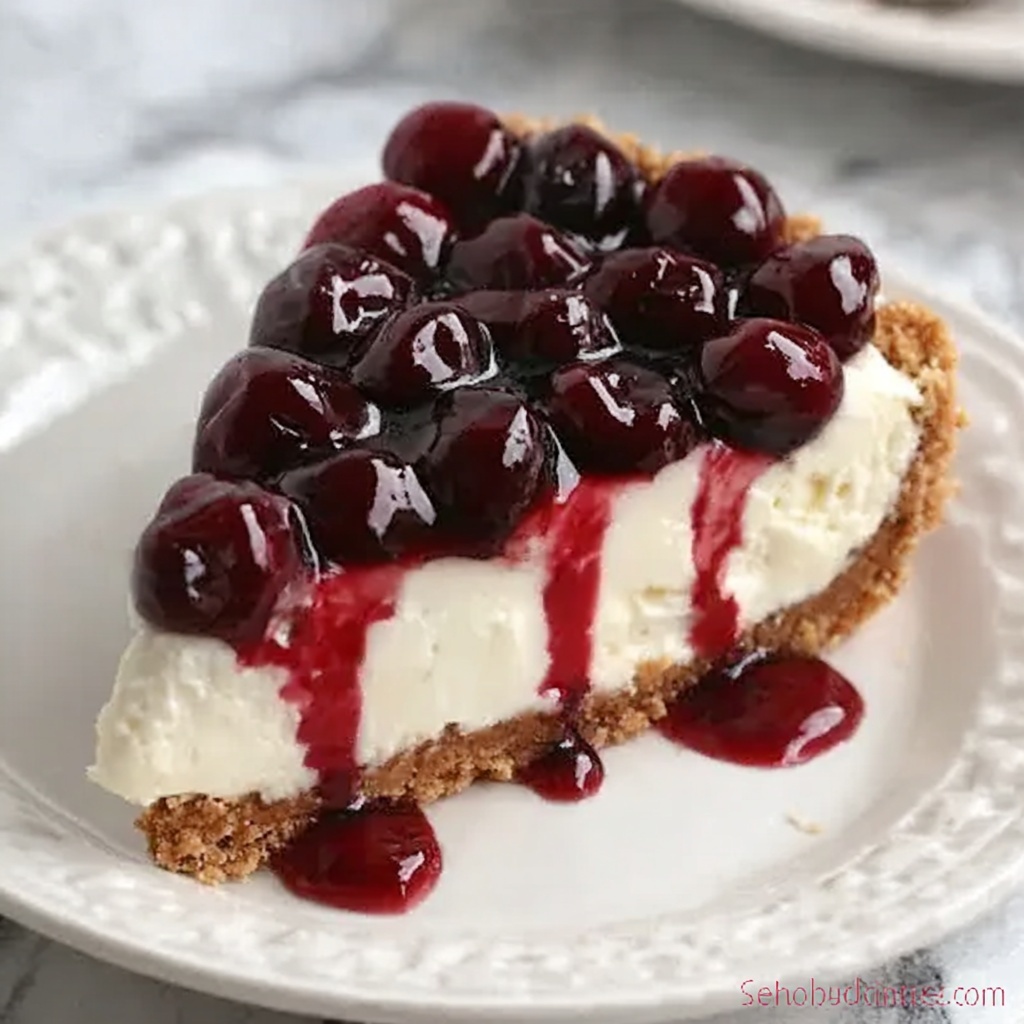
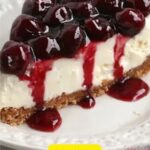
If you’re craving a delightful dessert that is both silky and bursting with fruity sweetness, this No-Bake Cherry Cheesecake Bars Recipe is exactly what you need. It blends the buttery crunch of graham cracker crust with a luscious cream cheese layer, all topped with vibrant cherry pie filling, making every bite a perfect harmony of texture and flavor. Best of all, no oven is required, so these bars come together effortlessly and taste like you spent hours perfecting them!
Ingredients You’ll Need
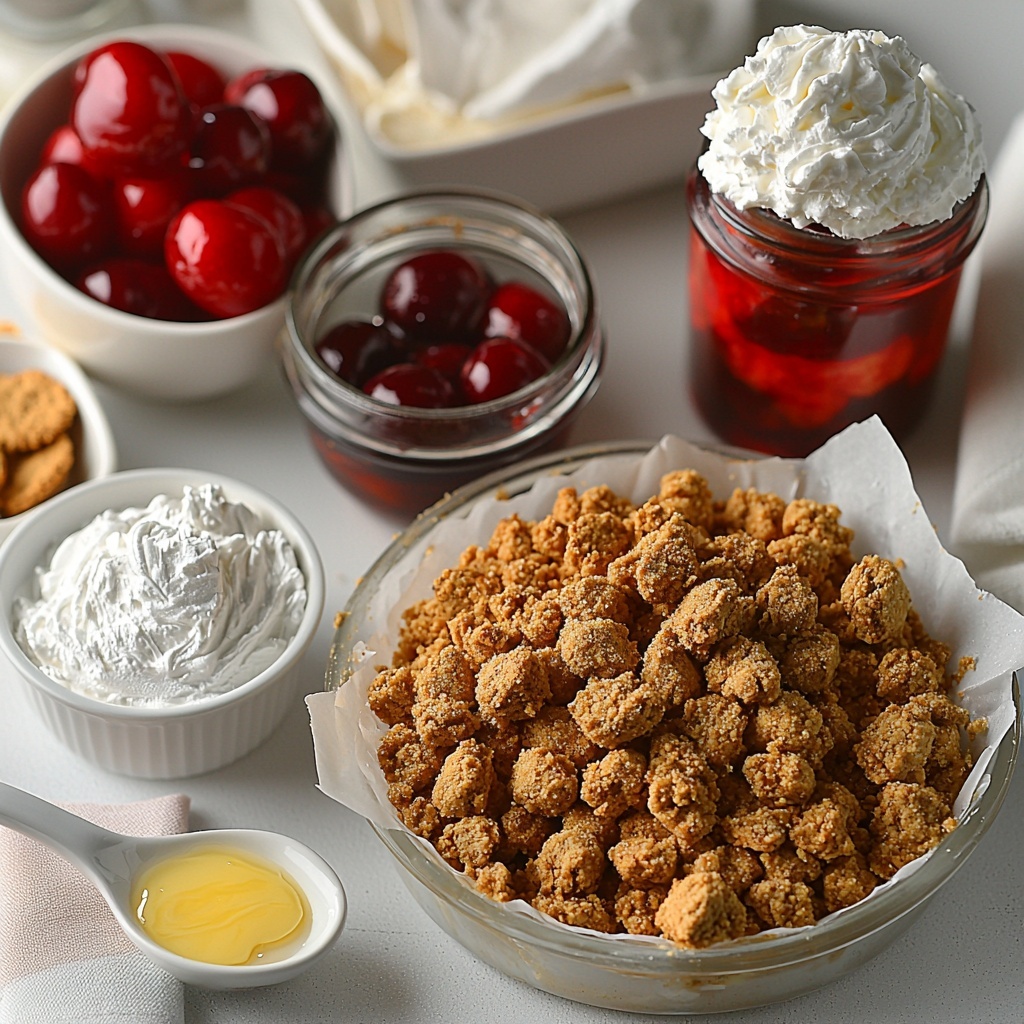
These simple ingredients come together beautifully to create a dessert that’s as gorgeous as it is delicious. Each component plays a crucial role in delivering the perfect balance of creamy, crunchy, and sweet in this no-bake treat.
- 7 tablespoons unsalted butter, melted: This binds the crust ingredients together and adds a rich, buttery flavor.
- 1 ½ cups graham cracker crumbs (about 9 whole crackers): The foundation of your crust, providing a crunchy texture and classic cheesecake vibe.
- 3 tablespoons granulated sugar: Sweetens the crust just enough to complement the creamy layer without overpowering it.
- 8 ounces cream cheese, softened: Offers that signature smooth and tangy base of any cheesecake.
- 1 cup powdered sugar: Blended with cream cheese to add sweetness and ensure a silky texture.
- 1 teaspoon pure vanilla extract: Enhances the flavor depth, giving a warm, aromatic touch.
- 1 container (8 ounces) Cool Whip: Lightens the cream cheese filling, making it fluffy and airy.
- 1 can (21 ounces) cherry pie filling: The crowning glory, providing juicy bursts of cherry sweetness and a glossy finish.
How to Make No-Bake Cherry Cheesecake Bars Recipe
Step 1: Prepare the Crust
Start by melting your butter in the microwave for about 30 seconds until fully liquefied. Then, mix it with graham cracker crumbs and granulated sugar until the mixture resembles wet sand. This texture ensures your crust will firm up nicely. Press this mixture firmly into a greased 8×8-inch baking dish, creating an even layer that forms the delicious, crunchy base for your cheesecake bars.
Step 2: Make the Cream Cheese Filling
In a large bowl, beat the softened cream cheese until it’s silky smooth and free of lumps. Slowly add in powdered sugar and vanilla extract, mixing well after each addition so your filling becomes sweet, creamy, and perfectly flavorful. This step is key to achieving that luscious cheesecake texture everyone loves.
Step 3: Fold in the Cool Whip
Carefully fold the Cool Whip into your cream cheese mixture, preserving as much fluffiness as possible. This will lighten the filling beautifully, giving your cheesecake bars an airy, melt-in-your-mouth quality that balances perfectly with the dense crust.
Step 4: Assemble and Chill
Spread the creamy filling evenly over the prepared graham cracker crust, smoothing the top gently. Then, spoon the cherry pie filling evenly across the surface, making sure every square gets a good amount of those bright, juicy cherries. Cover the dish tightly with plastic wrap or foil and refrigerate for at least 2 hours or overnight. This chilling time is essential for the bars to set properly and develop their full flavor.
Step 5: Slice and Serve
Once chilled, simply cut your cheesecake into bars. These No-Bake Cherry Cheesecake Bars Recipe slices are best served cold to showcase their creamy texture and refreshing cherry topping. Grab a fork and get ready for a bite of pure joy!
How to Serve No-Bake Cherry Cheesecake Bars Recipe
Garnishes
While these bars are stunning as is, enhancing them with fresh garnishes can elevate the experience. Try topping with a sprinkle of toasted sliced almonds for some crunch, or add a few fresh cherries and a small mint leaf for a pop of color and freshness. A dusting of powdered sugar can also add a delicate, elegant touch.
Side Dishes
Keep the focus on the bars by pairing them with light accompaniments. A cup of strong coffee or a glass of cold milk make classic pairings. For a more indulgent treat, serve alongside vanilla ice cream or a dollop of whipped cream to complement the creamy cheesecake filling beautifully.
Creative Ways to Present
Want to wow your guests? Arrange the bars on a pretty serving platter and drizzle some melted white chocolate over the top. You could also layer smaller squares in clear dessert cups with extra cherry filling and whipped cream for charming parfait-style servings. Individual portions make your No-Bake Cherry Cheesecake Bars Recipe feel extra special and inviting.
Make Ahead and Storage
Storing Leftovers
After enjoying your cherry cheesecake bars, store any leftovers in an airtight container in the refrigerator. They will stay fresh and delicious for 3-4 days, making them perfect for preparing ahead or enjoying little sweet bites throughout the week.
Freezing
If you want to keep your bars for longer, freezing is a great option. Wrap individual bars tightly with plastic wrap and place them in a freezer-safe container. They can be frozen for up to 1 month. When ready to enjoy, thaw the bars overnight in the refrigerator to maintain their creamy texture and flavor.
Reheating
This classic no-bake dessert is best enjoyed cold or at room temperature, so reheating is not recommended. Let frozen bars thaw naturally for the best texture and taste.
FAQs
Can I use store-bought graham cracker crumbs for this recipe?
Absolutely! Using store-bought graham cracker crumbs is a huge time saver and works just as well as crushing your own crackers. Just measure the amount carefully for the perfect crust texture.
Is it necessary to chill the bars overnight?
While chilling for at least 2 hours is the minimum, letting the bars chill overnight improves the flavor melding and ensures the bars are firm and easy to slice.
Can I substitute the cherry pie filling with another fruit?
Definitely! Blueberry, strawberry, or raspberry pie fillings can all be used to create a delicious twist on this No-Bake Cherry Cheesecake Bars Recipe, depending on your favorite flavors.
Do I need to use Cool Whip, or can I use homemade whipped cream?
Cool Whip adds stability and keeps the filling airy for longer, but homemade whipped cream can work if used immediately and folded in gently. Just keep in mind it may not hold up as well over time.
How do I make sure the crust stays firm?
Pressing the crust mixture firmly and evenly into the pan and melting the butter properly are key steps. Also, refrigeration allows the butter to set, keeping your crust crisp and sturdy under the creamy layers.
Final Thoughts
This No-Bake Cherry Cheesecake Bars Recipe is one of those magical desserts that feels indulgent yet is incredibly easy to put together. Its luscious layers and vibrant cherry topping never fail to impress, making it a go-to recipe to share with friends and family. Once you try it, you’ll see why this no-fuss dessert captures so many hearts!
“`
Print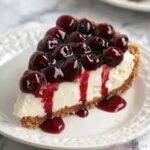
No-Bake Cherry Cheesecake Bars Recipe
- Prep Time: 15 minutes
- Cook Time: 0 minutes
- Total Time: 2 hours 15 minutes
- Yield: 9 servings
- Category: Dessert
- Method: No-Cook
- Cuisine: American
- Diet: Vegetarian
Description
These No-Bake Cherry Cheesecake Bars are a delightful, creamy dessert featuring a buttery graham cracker crust, a smooth cream cheese filling, and a sweet cherry topping. Perfect for warm days or when you want an easy yet impressive treat without turning on the oven.
Ingredients
Crust
- 7 tablespoons unsalted butter, melted
- 1 ½ cups graham cracker crumbs (about 9 whole crackers)
- 3 tablespoons granulated sugar
Cheesecake Filling
- 8 ounces cream cheese, softened
- 1 cup powdered sugar
- 1 teaspoon pure vanilla extract
- 1 container (8 ounces) Cool Whip
Topping
- 1 can (21 ounces) cherry pie filling
Instructions
- Melt Butter: Microwave the butter for about 30 seconds or until completely melted.
- Prepare Crust Mixture: In a medium bowl, combine melted butter, graham cracker crumbs, and granulated sugar. Mix until the texture resembles wet sand.
- Press Crust: Grease an 8×8-inch baking dish with butter or cooking spray. Press the crumb mixture firmly and evenly into the bottom of the dish to form the crust.
- Beat Cream Cheese: In a large bowl, beat the softened cream cheese until smooth and creamy.
- Add Sugar and Vanilla: Gradually add powdered sugar and vanilla extract, mixing until fully combined and smooth.
- Fold in Cool Whip: Gently fold in the Cool Whip, keeping the mixture light and fluffy.
- Assemble Filling: Spread the cream cheese filling evenly over the graham cracker crust.
- Add Cherry Topping: Spoon the cherry pie filling evenly over the cream cheese layer.
- Chill Bars: Cover with plastic wrap or aluminum foil and refrigerate for at least 2 hours or overnight to set.
- Serve: After chilling, slice into squares and serve cold.
Notes
- For firmer bars, refrigerate overnight.
- Use softened cream cheese to ensure a smooth filling.
- Graham cracker crumbs can be homemade by crushing crackers finely.
- These bars can be stored in the refrigerator for up to 3 days.
- Feel free to substitute cherry pie filling with other fruit toppings like blueberry or strawberry.


